The Kanangra to Katoomba (K2K) route is a rite of passage for anyone who scoffs at the word difficult. Once a well-trodden track, it has faded into a barely-there footpad traversing 45km through the untamed wilderness of Kanangra-Boyd and the lesser known areas of Blue Mountains National Park. Some even dub it ‘The Hardest Overnight Hike in NSW’.
There are two K2K hikes in NSW. This is not to be confused with the hike from Kiandra to Kosciuszko that follows the Australian Alps Walking Track (AAWT) in Kosciuszko National Park.
Skip to:
- Quick Look
- About the K2K
- Skill Level Needed to Hike the K2K
- Where to Start the K2K
- Best Time to Hike the K2K
- Where to Stay Nearby the K2K
- Trip Report
- Tips for Hiking the K2K
Quick Look
Distance: 45km (one-way)
Elevation Gain: 2500m
Duration: 2-4 days
Skill level: Advanced
Location: Kanangra-Boyd & Blue Mountains National Park, NSW
GPX: https://ridewithgps.com/routes/49163095
About the K2K
The K2K track runs through the lands of the Gundungurra people. Although there are many significant Aboriginal sites like rock art and ceremonial locations in the area, there exact locations are protected to preserve and respect cultural heritage.
Europeans first made their way into this part of the mountains back in 1802, when French surveyor Francis Barrallier led an expedition into the southern Blue Mountains. As for the K2K itself, no one’s really sure who first hiked it, but it’s believed bushwalking clubs and outdoor enthusiasts started exploring and mapping routes in the area around the early 1900s.
Skill Level Needed to Hike the K2K
Classed as a Grade 5 hike, this is for experienced walkers only. Months of summer bushfires and pandemic lockdowns have taken their toll, transforming the trail into a challenging and overgrown route. It passes through a declared wilderness area, so there is no track maintenance, or trail markers.
Over the years, it has been the site of countless search-and-rescue operations, as a result of its challenging navigation, unreliable water sources, and steep, rugged terrain. Many underestimate this hike. Need any more warning? Just read the reviews on AllTrails. Some hikers give it a one-star rating with comments like “Don’t forget the machete!” and “No trail (read: none).”
For the truly ambitious, the hike can extend south from Kanangra Walls to Mittagong. I haven’t walked this section yet, so I can’t comment on the condition of this track (yet).

Where to Start the K2K
The K2K can be walked in either direction. Unless you’re feeling particularly masochistic and want to do an out-and-back, you’ll need to prearrange transport. We started at Kanangra Walls Lookout carpark and ended at the Narrow Neck Trail park gate (Katoomba) for an easier car shuttle home. Kanangra Walls Lookout carpark is under a 3.5-hour drive south west from Sydney, or a 3.5-hour drive north from Canberra. Whilst the Narrow Neck Trail park gate is a 1.5-hour drive west from Sydney or just over 3.5-hours north from Canberra. It is about a 2-hour drive between these two trailheads.
Best Time to Hike the K2K
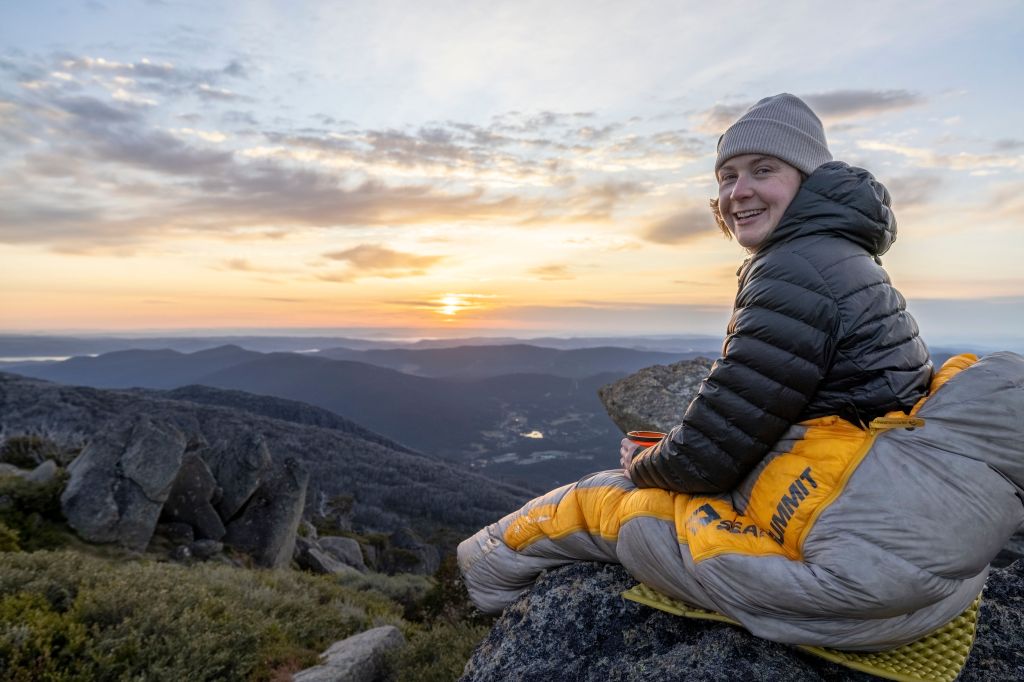
Spring and autumn are the best times to hike the K2K, with mild temperatures and more stable weather. Spring brings wildflowers and flowing creeks, while autumn offers crisp air and clear days. Summer should be avoided due to extreme heat, bushfire risk, and unreliable water sources. Some creeks dry out completely, requiring longer water carries. After heavy rain, the Coxs River can flood, making river crossings dangerous or impossible. Winter is an option for hikers prepared for cold temperatures and wild weather, but it’s just not for me.
Where to Stay Nearby the K2K
We arranged our car shuttle the night before and stayed at Boyd River Campground, just 7km from the Kanangra Walls Lookout trailhead. It’s a lovely little spot with a creek running alongside it, an open shelter with picnic tables, and drop toilets. Bookings are required ahead of time on the NSW National Parks website.
Trip Report
Day 1: Kanangra Walls to Coxs River (20km, 993m elevation gain)
Kanangra Walls to Plateau
The trail kicks off at the Kanangra Walls Lookout car park. A short detour takes you to the Walls Lookout, and trust me, this view is not to be missed. The landscape is jaw-dropping, with sheer cliffs that seem to stretch forever. The start of the hike walks along the top of these walls, so it’s worth soaking in the adventure ahead.
The first 3km’s across the Kanangra Plateau are deceptively gentle. It’s a defined, scenic trail that lulls you into thinking “this isn’t so bad.” Five minutes in, I was tripping over rocks as I tried to take in the expansive views. Keep an eye on your footing though; there’s no fences at the cliff edge.

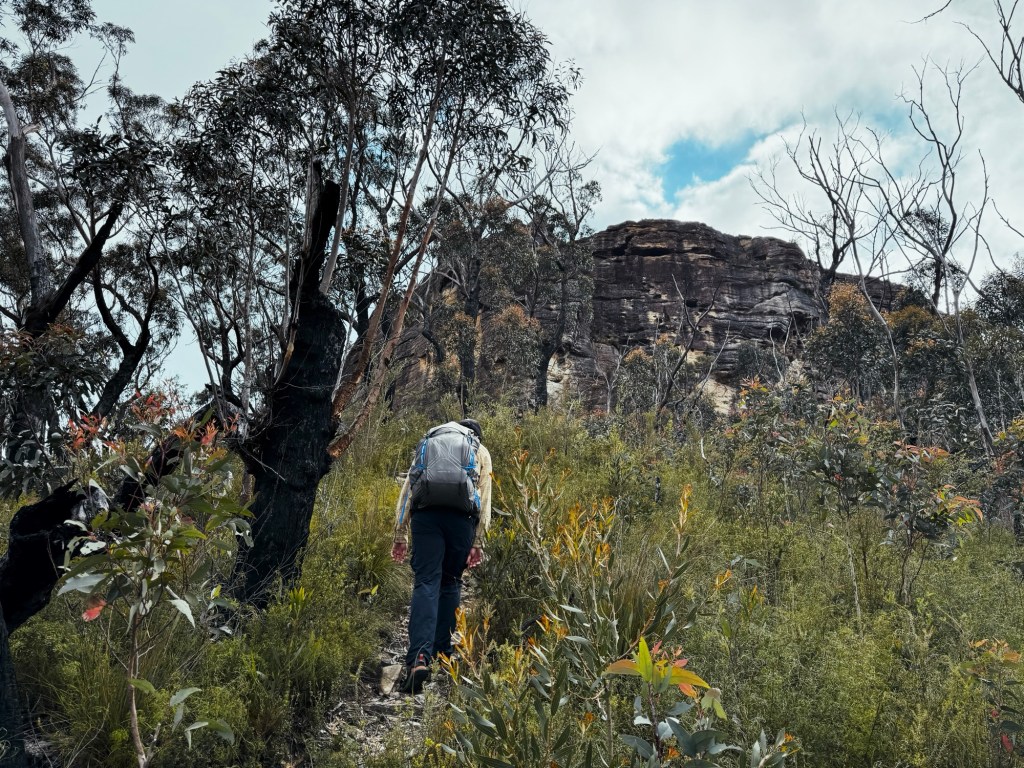
Plateau to Mount Cloudmaker
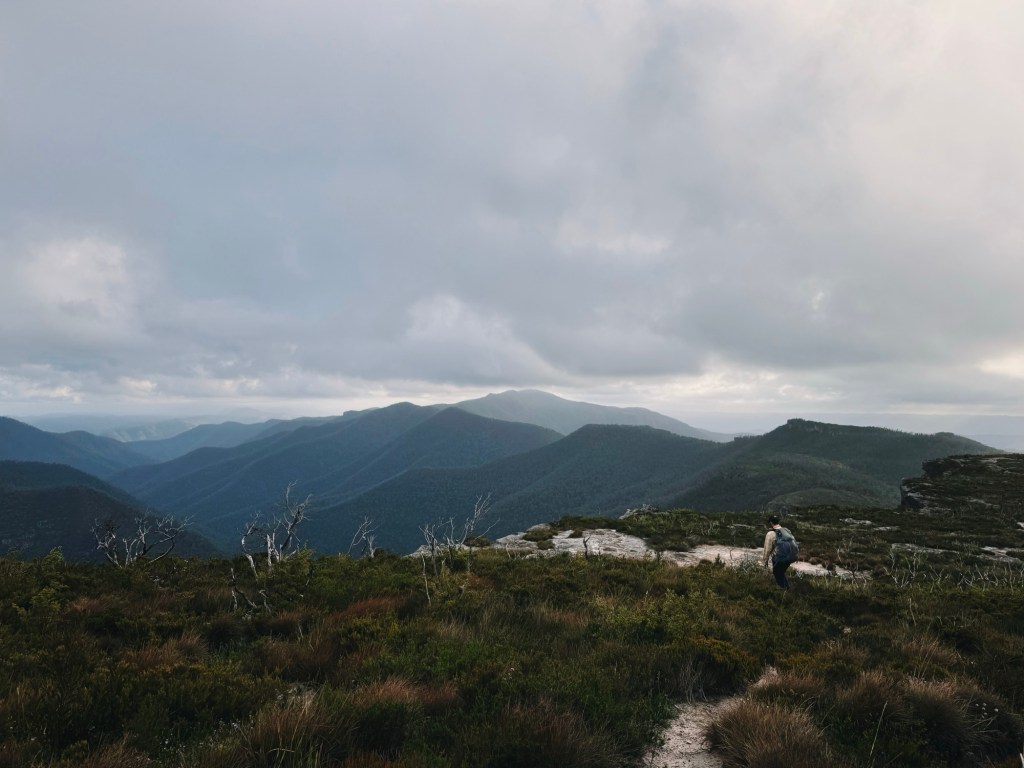
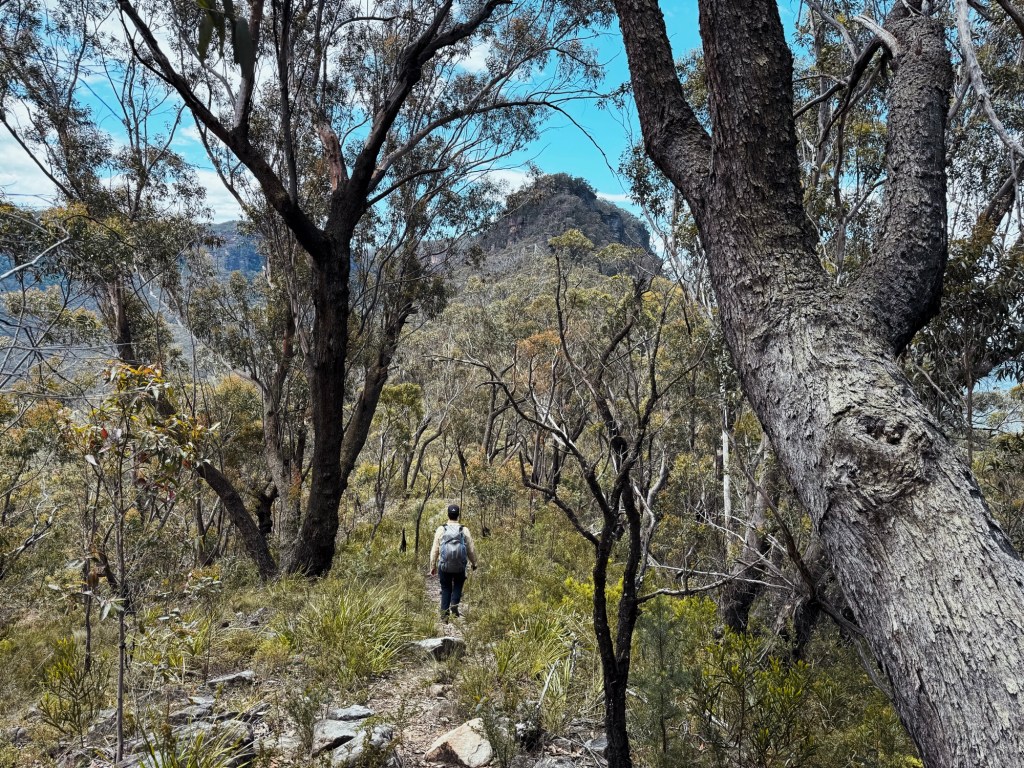
Things quickly change after descending off the plateau through a gap in the cliffs. The trail becomes a rollercoaster of steep ascents and descents along the ridgeline. Massive rocky cliffs force the path to either climb over or skirt around them. It’s a steady climb to the summit of Mount Cloudmaker, passing charmingly named knolls Rip, Rack, Roar, and Rumble.
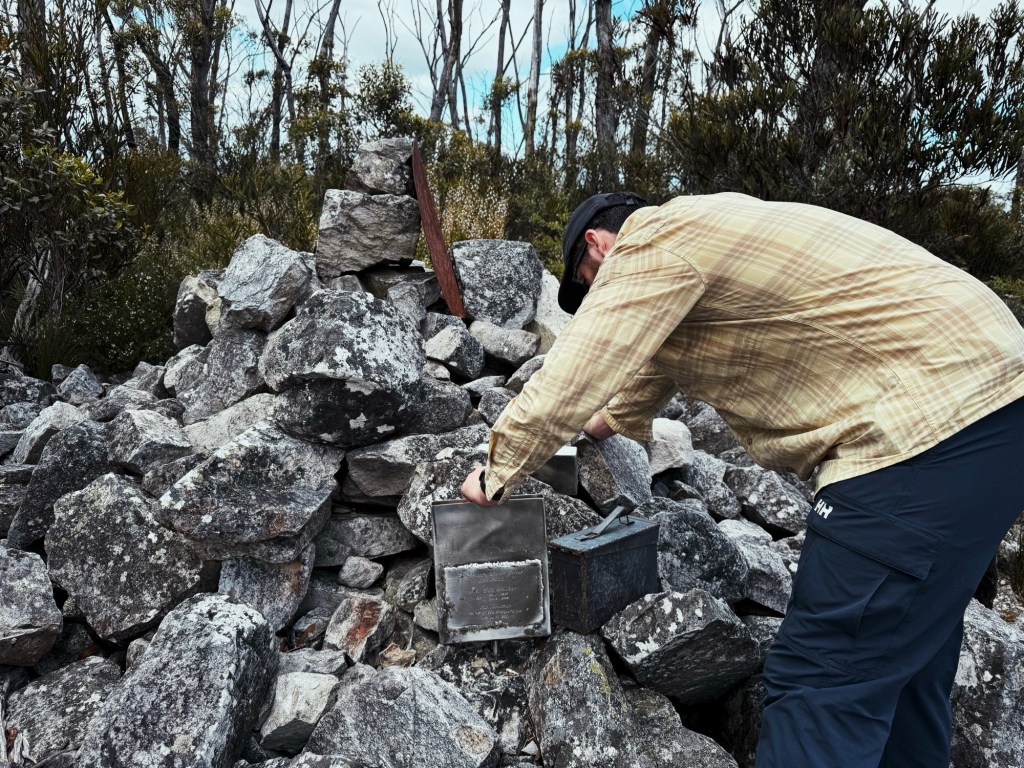
Reaching Mount Cloudmaker is an achievement in itself. While trees obscure the views, glimpses of jagged peaks are a reminder just how far from civilization you are. At 1164m, it’s the highest point on the trail and home to a massive rock cairn and summit logbook. Flipping through the pages, most entries are from hikers who either did an out-and-back to this summit or hiked to 100 Man & 1000 Man Caves instead.
Mount Cloudmaker to Dex’s Creek
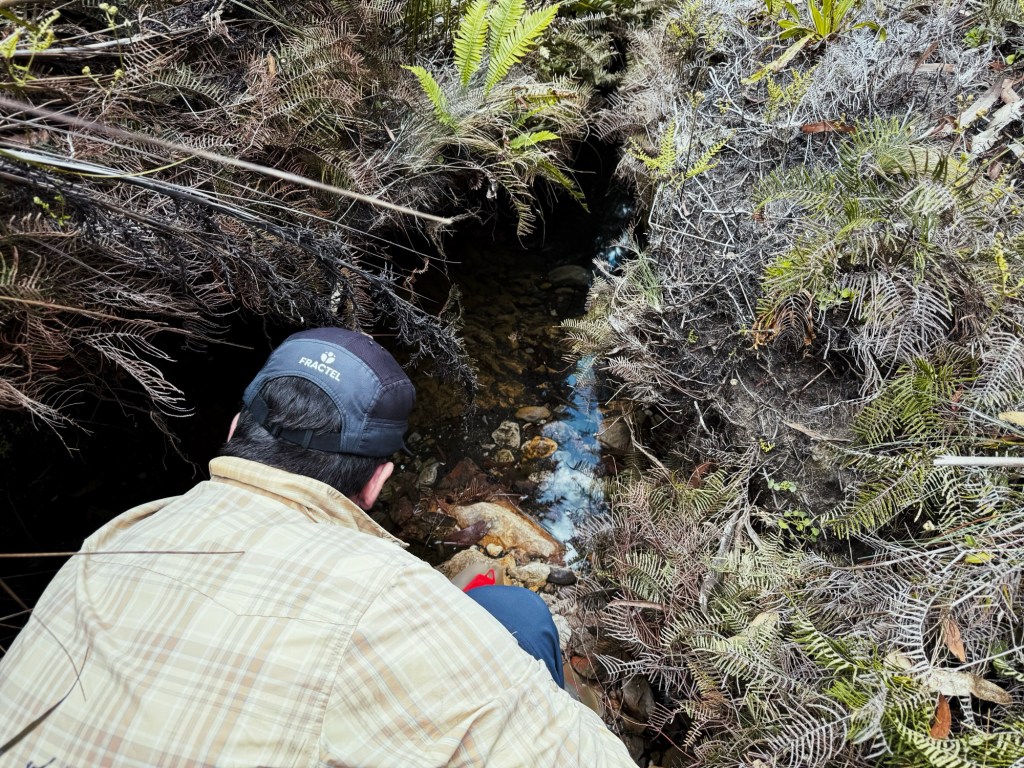
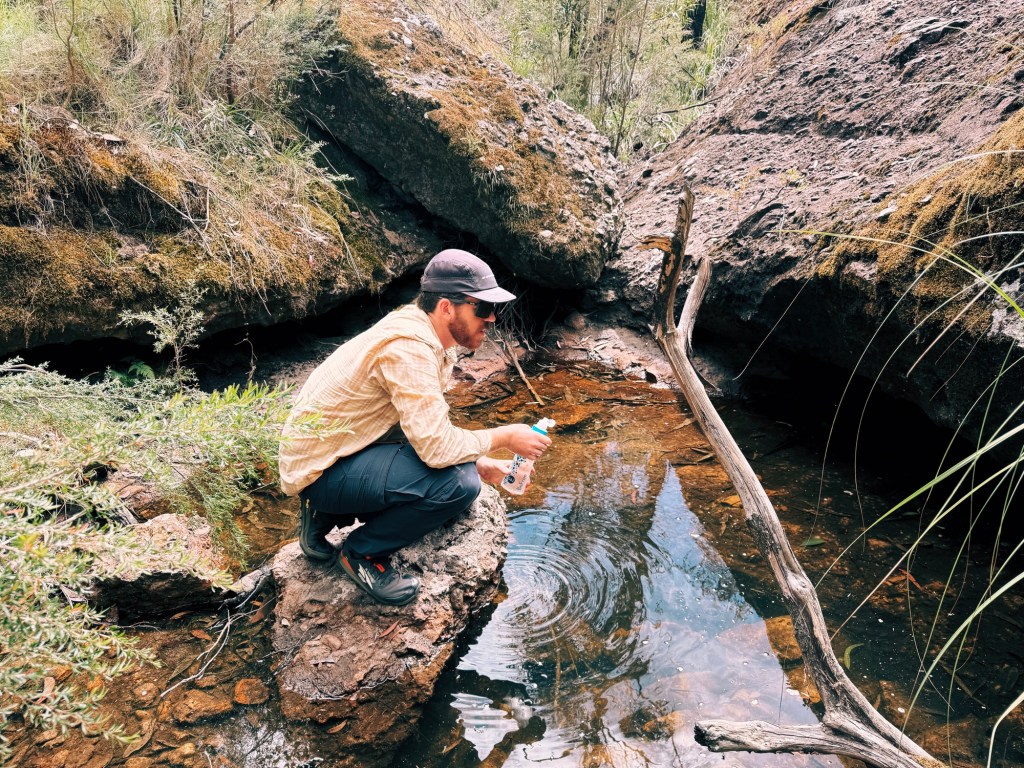
Immediately after Mount Cloudmaker, the trail grows even wilder, to almost no footpad at all. Thankfully, the bush isn’t too dense on the descent to Dex’s Creek. Dex’s Creek is a gorgeous campsite with a flat grassy patch that comfortably fits three tents and a fire pit. Although the creek wasn’t flowing, there was a deep, clear, stagnant pond we could filter our water from.
Dex’s Creek to Mount Strongleg
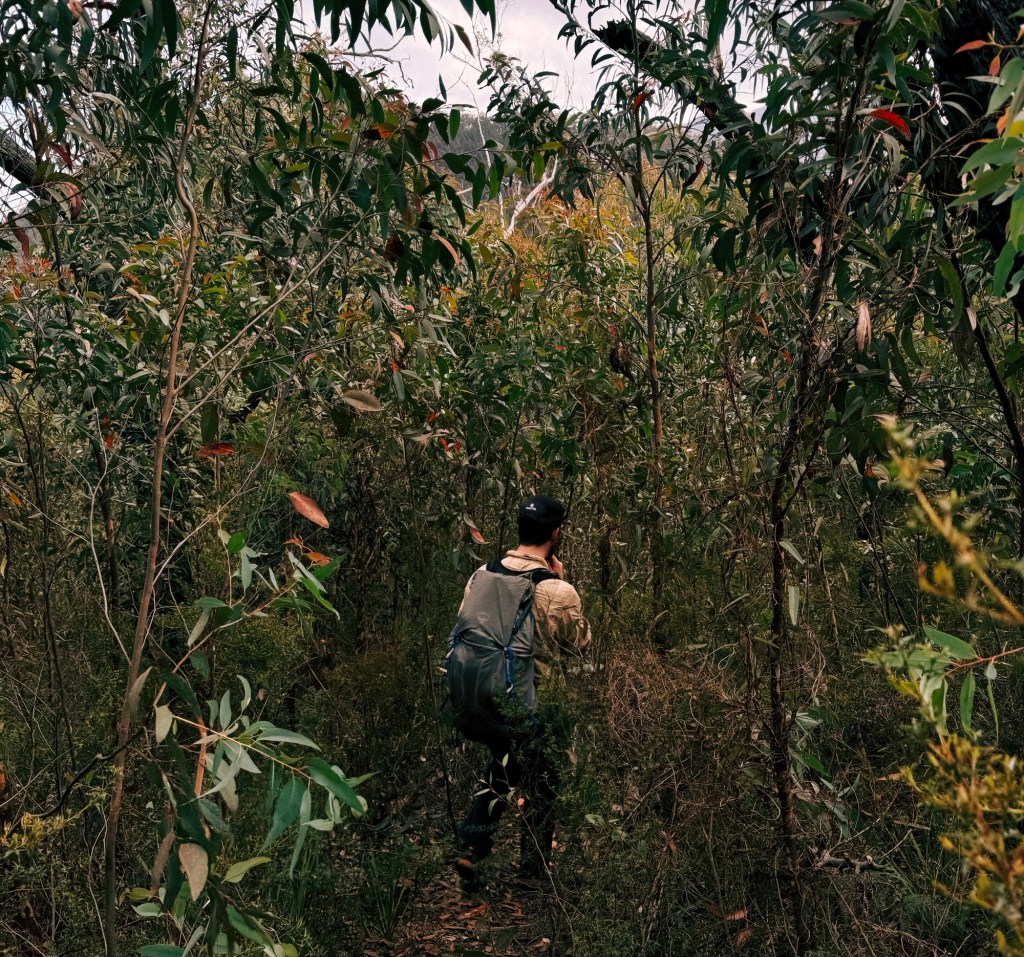
This section is where the K2K earns its reputation (for us anyway). There are several footpads leading out of the campsite through a bog, so it’s easy to be led astray. The trail is virtually non-existent around Carra Top, turning our pace into a sluggish 1km per hour. Trees clawed at our packs, and the overgrowth was relentless (claustrophobic at times). Things improved as we neared Mount Strongleg, where the ridge narrowed, the trees fell away, and a footpad emerged again.
Mount Strongleg to Coxs River
The descent toward Coxs River was steep but manageable, if you stick right on the spur. Deviating too early risks landing in a labyrinth of scrub. On a hot spring day, the sight of the river below was a huge motivator for us.

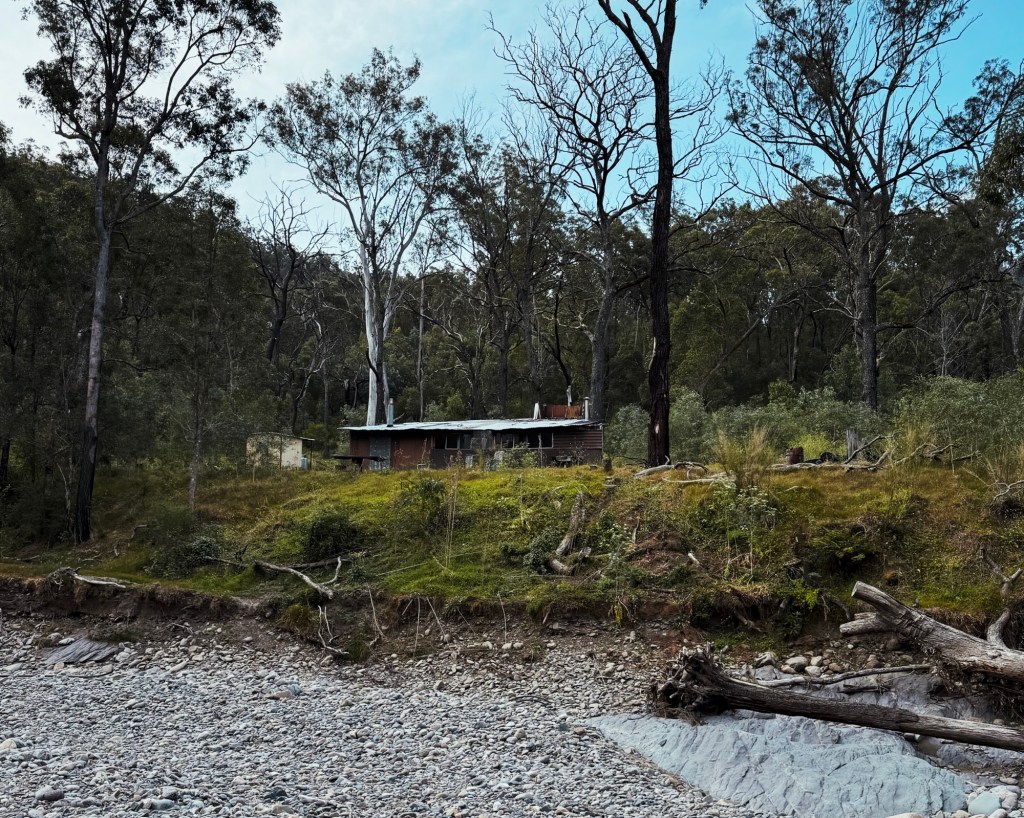
We arrived at Kanangra Creek, and took a quick dip in the river to refresh our weary bodies. We spotted a strange shack on the other side of the river, but it screamed private property so we didn’t cross to check it out. We continued down to the Cox’s River where we found a nice grassy spot along the riverbanks to settle in and set up camp for the night.
Day 2: Coxs River to Katoomba (25.5km, 1550m elevation gain)
Coxs River to Mount Yellow Dog
We started our second day nice and early, not knowing what to expect from the next part of the trail. As we ate our breakfast, a pair of sea eagles soared overhead, settling in a tree across from our camp.

Walking along the Coxs River, we searched for the best place to cross. Josh confidently opted to balance on a fallen tree, while I decided to get my feet wet, wading through a shallow section.
The entrance to the trail was tricky to spot, but once we hit the spur, the path became clearer. It was surprisingly well-trodden compared to the previous day. However, there are a few misleading footpaths where others had gone astray, so watch for the switchback turns.
Mount Yellow Dog to Mobbs Swamp
We stopped for a break at the summit of Mount Yellow Dog, marked by a small rock cairn. As we descended, the gums transitioned into a pine-filled forest, and the trail was littered with fallen trees. Climbing over one every couple of hundred meters, we guessed this was the aftermath of a recent storm.

There’s an optional high route to Splendour Rock and Mount Merrimerrigal, marked only by a single coloured tag on a tree. It’s easy to miss, so keep an eye out to spot the detour.
We soon arrived at Mobbs Swamp (sometimes called Mobbs Soak), where a newly built campsite surprised us. The area included a drop toilet still under construction. We went on a hunt for some water at the nearby dried up creek, and found a stagnant pool we could filter. Nearby, a rock overhang offered a shady spot to escape the heat for another snack break.
Mobbs Swamp to Medlow Gap
The trail suddenly dropped us onto a gravel road, a pleasant break for our weary bodies. We soon passed a gate with a warning sign threatening heavy fines for vehicles entering Sydney’s drinking water catchment area.

Medlow Gap to Tarros Ladder
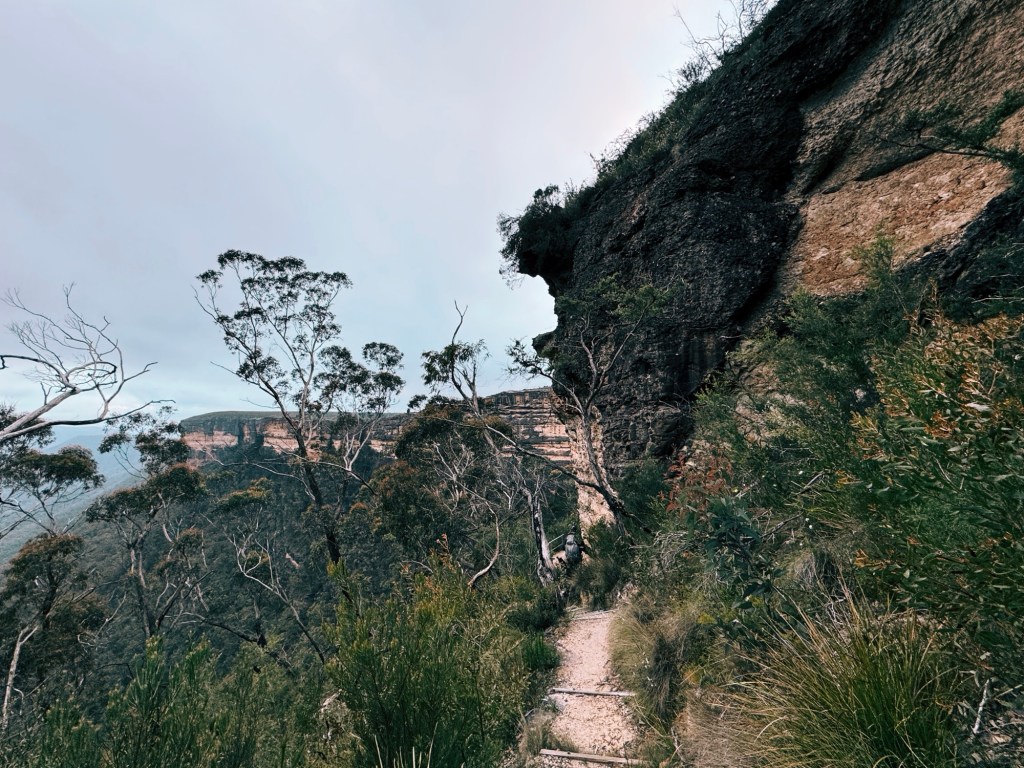
At the fork in the road, we followed the Tarros Ladder-Medlow Gap walking track. This section of the trail is surprisingly well-maintained, though it involves a short, steep climb to reach Tarros Ladder.
I’d love to say I ascended Tarros Ladder with the grace of a mountain goat, but the reality had far more swearing. The climb includes rock scrambling, bolted holds, and a sturdy ladder. If you’re afraid of heights, this section can be intimidating. Thankfully, there are plenty of spots to catch a breather and take in the Bluey’s iconic sandstone cliffs, and Lake Burragorang (Warragamba Dam) visible in the distance.

Tarros Ladder, Narrow Neck, and Home
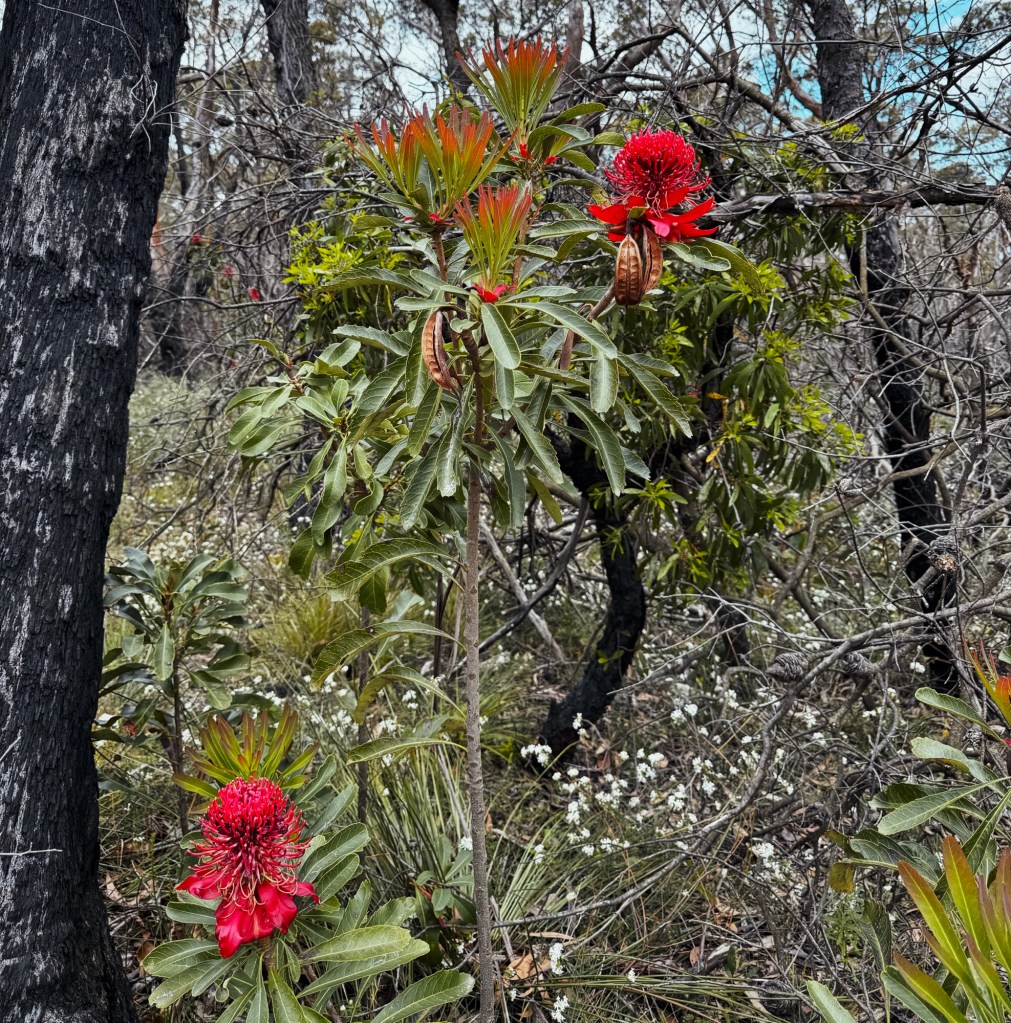
From the Narrow Neck, you’re on the home stretch. The final walk along Narrow Neck fire trail was an unexpected delight, having never been on this 4×4 track before. Wildflowers like Honeysuckles and Waratahs were in full bloom beside the gravel road, and the views were nothing short of spectacular. The track was so smooth, in fact, that we ran part of the final 9-kilometres back to the car at the Narrow Neck Trail park gate.

Tips for Hiking the K2K
Phone service: Phone reception (I’m with Optus) was available along the ridges but dropped out quickly in the valleys. A satellite phone or PLB is essential for emergency communication.
Closures: Always check for park closures and fire bans before heading out.
Water: The Coxs River is the only consistent option, but it requires filtering due to surrounding farmlands. Both Dex’s and Mobbs camp water supplies have been known to go dry.
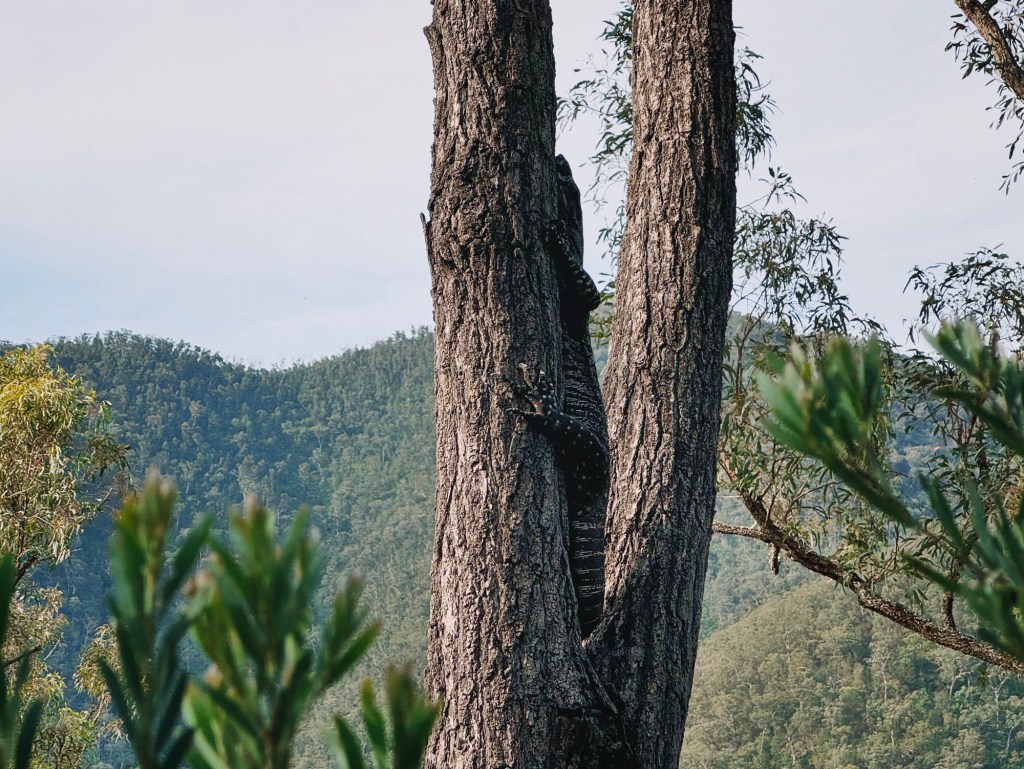
Wildlife: Snakes and Monitors are common, so always carry a snake bandage and a form of emergency communication.
Disclaimer: Content on Path & Pedal is for general information and inspiration only. All route guides and trip reports are based on personal experience and research at the time of writing. Conditions, access, weather, and regulations can change. Always check official sources and use your own judgment. Outdoor adventures carry risk, and Path & Pedal accepts no liability for injury, loss, or damage.


Leave a comment