The plan was to follow the ‘Glow Worm Tunnel: Bell to Newnes’ route designed by Omafiets with a few extra side trips. But plans are just suggestions, right? Once the reality of speeding cars and rutted roads set in, detours started looking far more appealing. Soon enough, I was cruising along smooth, winding forest trails, and realizing the best parts of this ride weren’t in the original plan at all. They say it’s about the journey, not the destination but this ride had both, with a pretty special camp spot waiting at the end to top it all off.

Skip to:
- About the National Parks
- Skill Level Needed for the Glow Worm Ride
- Best Time to do the Glow Worm Ride
- Where to Start the Glow Worm Ride
- Where to Stay Nearby the Glow Worm Ride
- Trip Report
- Tips for the Glow Worm Ride
Quick Look
Distance: ~120km (including all suggested side trips)
Elevation Gain: ~1800m
Duration: 2-3 days
Surface: 100% Gravel
Skill Level: Intermediate/Advanced
Location: Gardens of Stone & Wollemi National Park, NSW
GPX: https://ridewithgps.com/routes/49752047
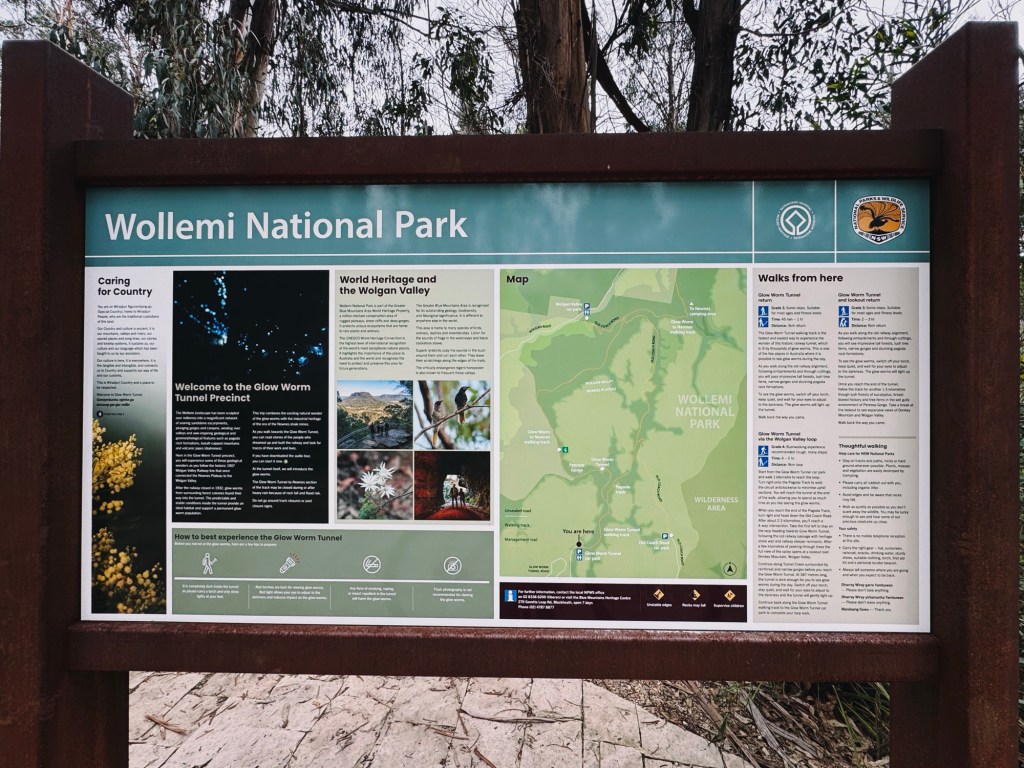
About the National Parks
For thousands of years, the Wiradjuri, Dharug, and Gundungurra people have cared for these lands. Wollemi National Park alone holds over 120 recorded cultural sites: rock engravings, ceremonial grounds, grinding grooves, stone arrangements, and scarred trees.
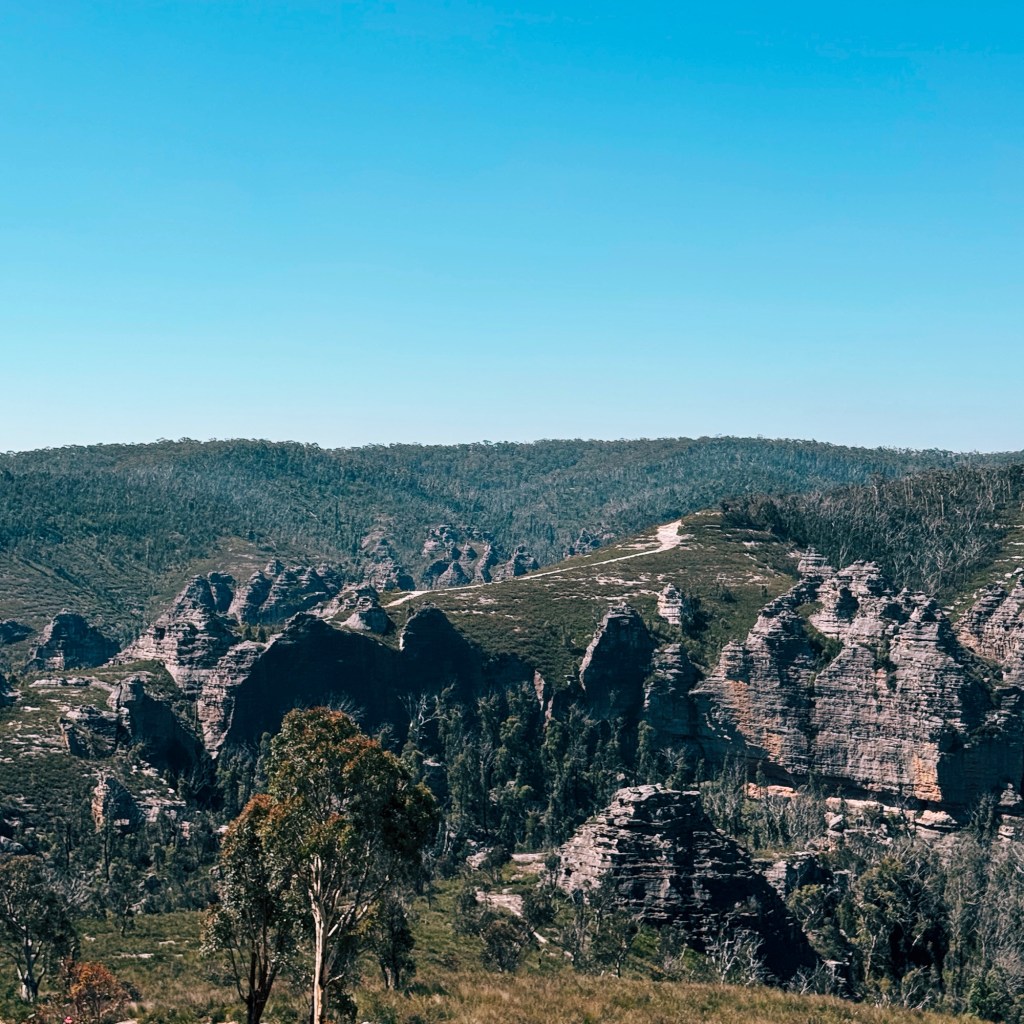
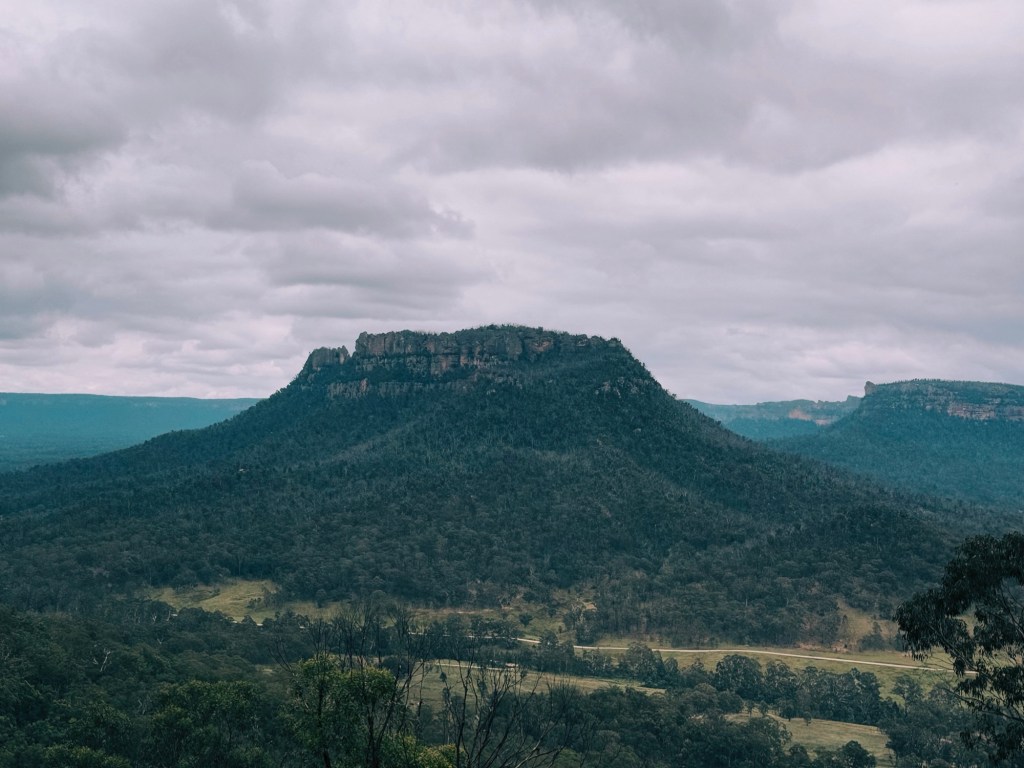
This route travels through two stunning national parks, Gardens of Stone and Wollemi, both part of the Greater Blue Mountains World Heritage Area. Gardens of Stone is a geological wonderland of towering rock pagodas, hidden gorges, and windswept plateaus, sheltering rare species like the giant dragonfly, spotted-tailed quoll, and broad-headed snake.
Meanwhile, Wollemi’s rugged wilderness is home to deep slot canyons, towering escarpments, and the ancient Wollemi Pine: a ‘dinosaur tree’ thought extinct until 1994. One of the state’s wildest and least disturbed landscapes, it’s as remote as it is breathtaking.
Skill Level Needed for the Glow Worm Ride
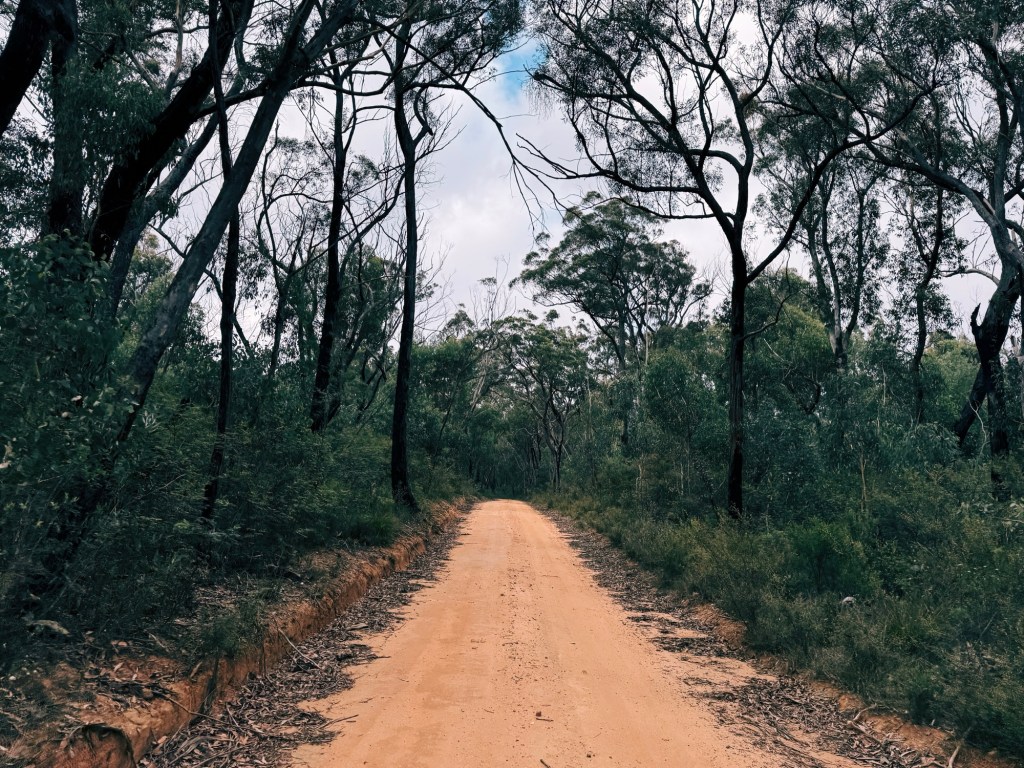
For those new to bikepacking, sticking to the Omafiets route on the main roads is the way to go. They’re easy to follow, and the riding is relatively straightforward. But be warned: the rutted road surface can get old fast, and constant traffic means an inevitable spray of dust to the face. Personally, I found veering off onto quieter trails much more enjoyable for the scenery and the challenge. Expect rougher terrain, a bit of route-finding, and a whole lot more fun.
Best Time to do the Glow Worm Ride
This route is open year-round, but now’s the perfect time to go as Newnes Campground is currently closed to vehicles due to road damage further up Wolgan Road, making it quieter than usual. The Glow Worm Tunnel Road sees the most traffic on weekends and school holidays, so if you prefer a more peaceful ride, aim for midweek or off-peak times.
Where to Start the Glow Worm Ride
This route is a lollipop loop, meaning it starts and finishes in the same location. The Zig Zag Railway car park in Clarence might seem like the perfect starting point but unfortunately you can’t park overnight there. Just across the road, on the other side of the highway there’s a gravel patch that works just fine.

Where to Stay Nearby the Glow Worm Ride
I camped at the free Lockyers Track Campground before starting the ride. It had basic facilities, but it was a pleasant enough spot and not too far (20-min drive) from Clarence.
As for the campground on the ride itself, Newnes Campground, bookings are required ahead of time. A word of warning: there are plenty of bindies in the grass, so be sure to bring a groundsheet to protect your tent & sleeping mat.
Trip Report
Day 1: 54km, 511m Elevation Gain
Sitting in the carpark across from the Zig Zag Railway, coffee in hand, watching the rain on the windscreen, I debated my life choices. Right now, the 3.5 hour drive home sounded more appealing than getting out of the car, and going on a soggy adventure. I’d been to Newnes Campground years ago on a car-camping trip, so the thought of riding into that paradise got me out of the car, and pedaling out.
Starting down the Old Bells Line of Road, visibility was as exciting as staring at a fogged-up bathroom mirror. I’ll be honest, at first the ride was miserable. With no view, and the rain pouring down, the focus was solely on pedalling, head down, legs turning over out of pure stubbornness.

I soon turned onto the busier Glow Worm Tunnel Road. Mud splattered with every passing car, the rutted road jarred with every bump, and the enthusiasm to push forward wavered. Why was I riding this road, when I could be driving it in the comfort of my own vehicle?
Detour: Lost City North Lookout
Passing the turn-off to Lost City North Lookout (Lost City North Road), the first of hopefully many side-quests, my heart sank as I saw the ‘road closed’ sign. Shame on me for not checking for park closures before I left. (I did drive to the open Lost City South Lookout on my way home, and can vouch that the towering rock formations are worth the short detour when it opens again)
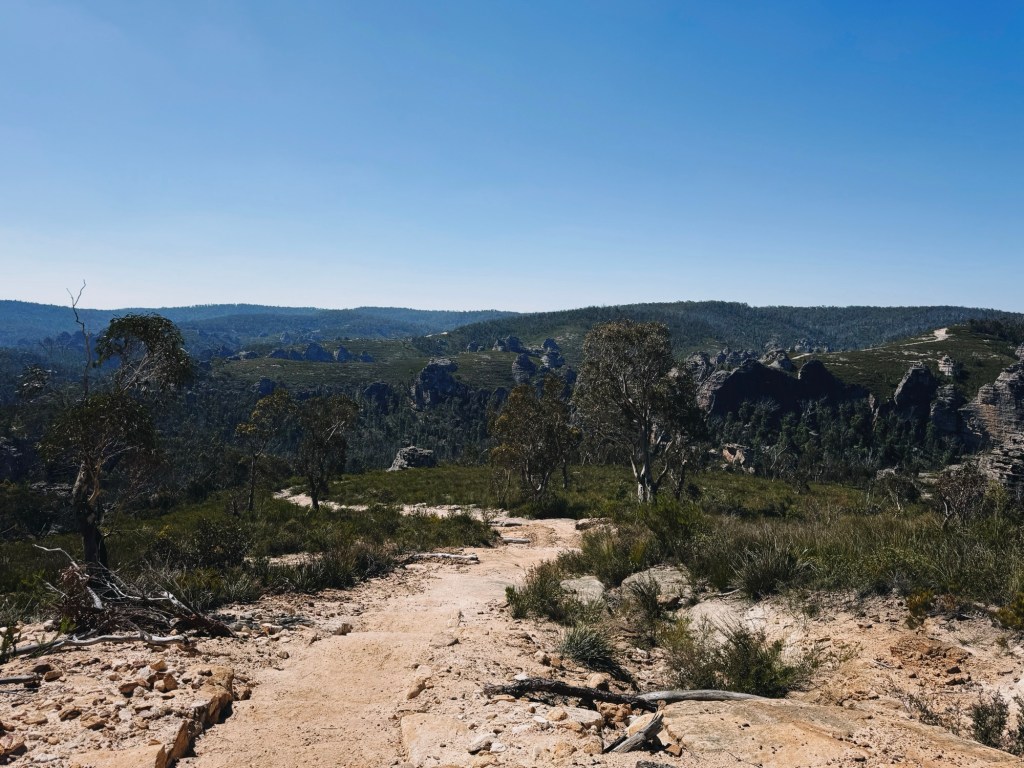
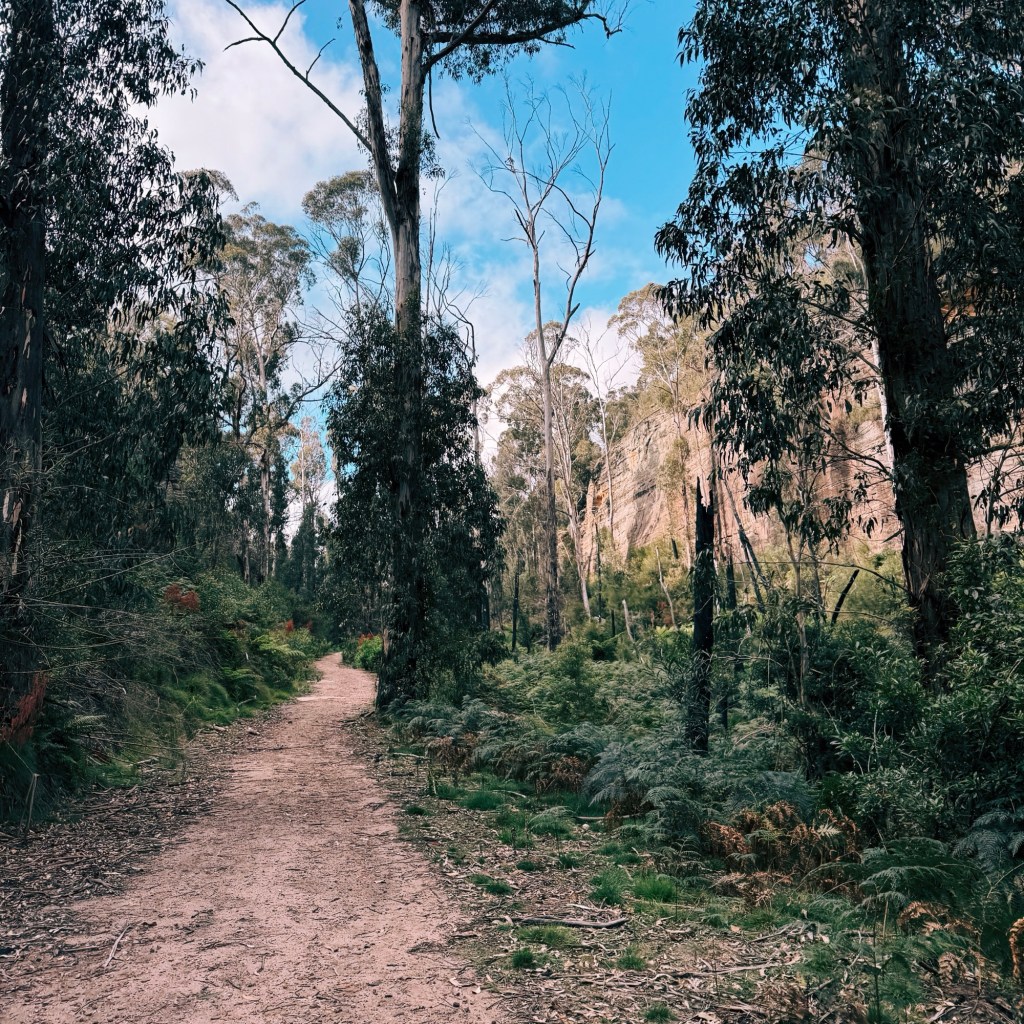
I suddenly came to the realization; there was no need to stick to this busy dirt road when the area was filled with incredible forest trails just waiting to be explored. A quick glance at the map, a sharp turn onto Camp Road (running parallel to Glow Worm Tunnel Road), and the ride transformed entirely. The moment the wheels hit the quieter gravel, a wild dog family appeared up ahead. Good omen? I think so!
The road wound through thick forest, passing a few dams and the ruins of some tiered rock walls. The easing rain had soaked the landscape, causing a passing stream to become a small waterfall cascading down a rock face, and I even contemplated going for a swim.

The forest trail ran its course, forcing a reluctant return to the traffic-heavy Glow Worm Tunnel Road. But adventure mode was fully activated, and I spotted another quieter track running parallel just 20 meters off to the right. It was blissfully peaceful for a few kilometres until it too, came to an abrupt halt at Wollemi National Park’s boundary.
Detour: Secret Crag Road
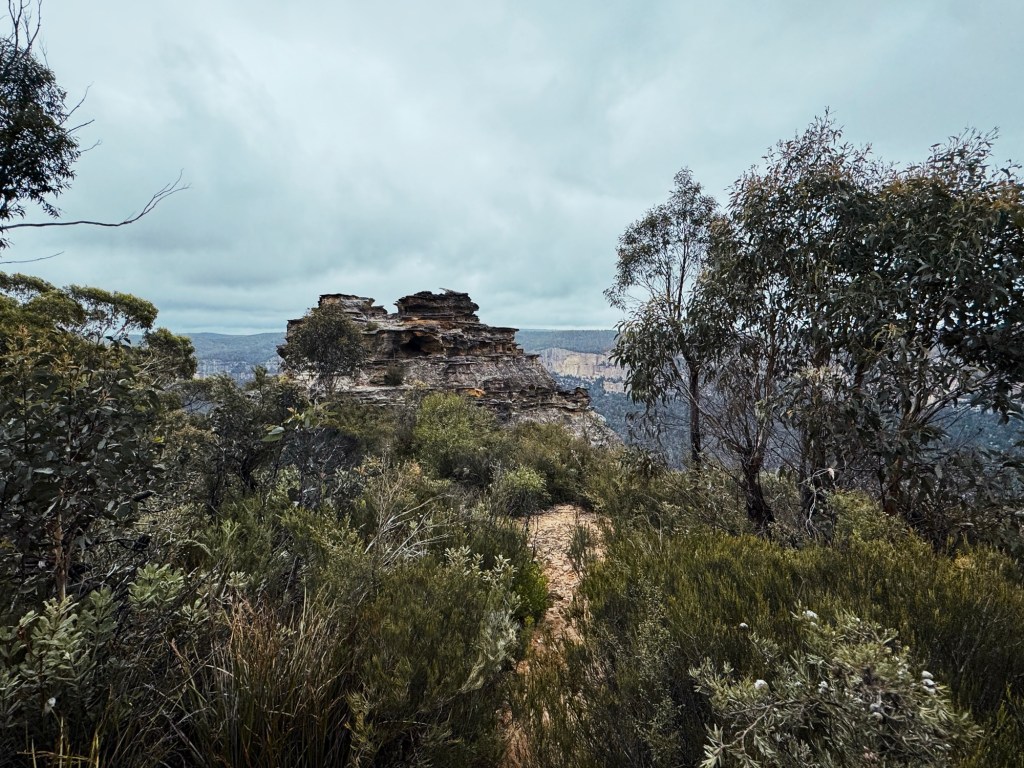
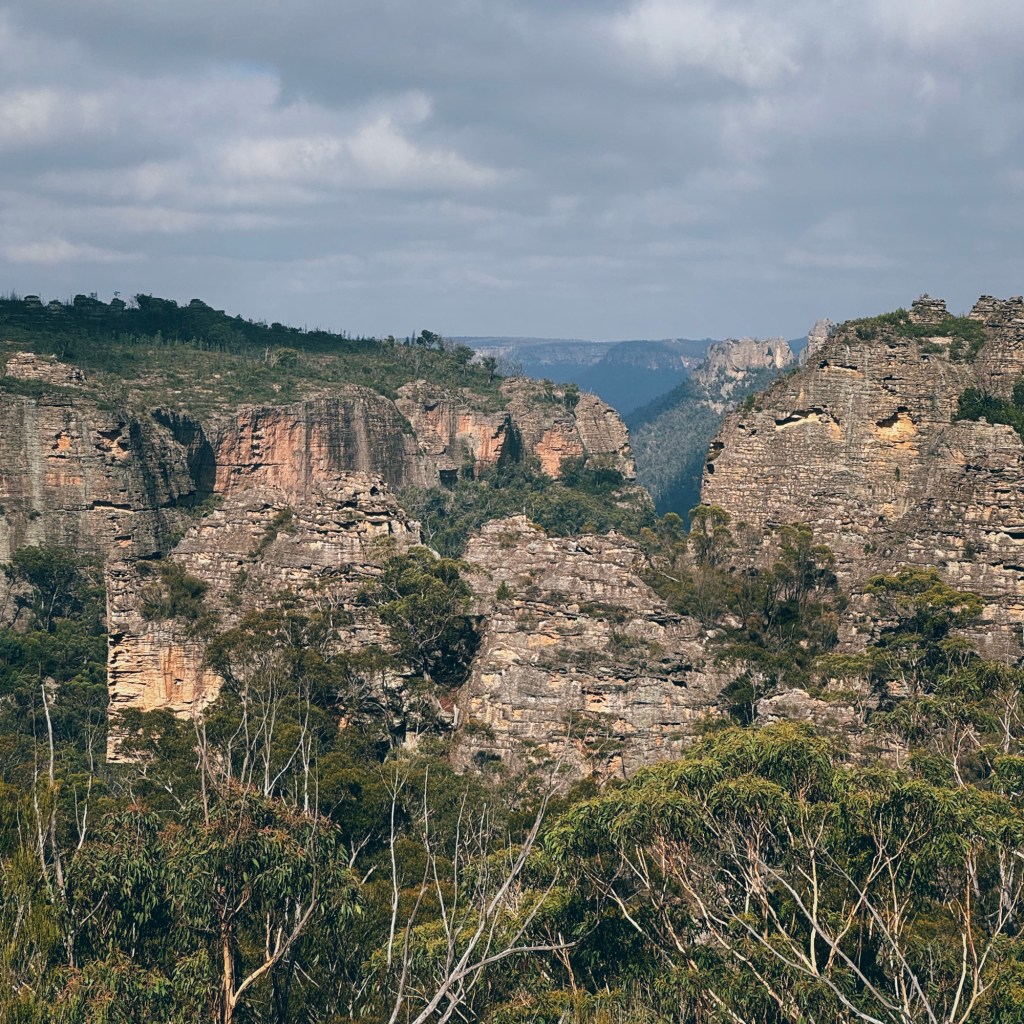
Back on the Glow Worm Tunnel Road, I took another glance at the map, ‘Secret Crag Road’, with a name like that it was impossible to resist. A quick descent down, and the road faded into a singletrack. I stashed the bike in the trees, and followed the trail on foot, winding down to a towering pagoda with sheer cliffs dropping into the valley below. I sat and ate my lunch, unable to wipe the smile off my face, happy with my decision to push through the rain for this view alone.
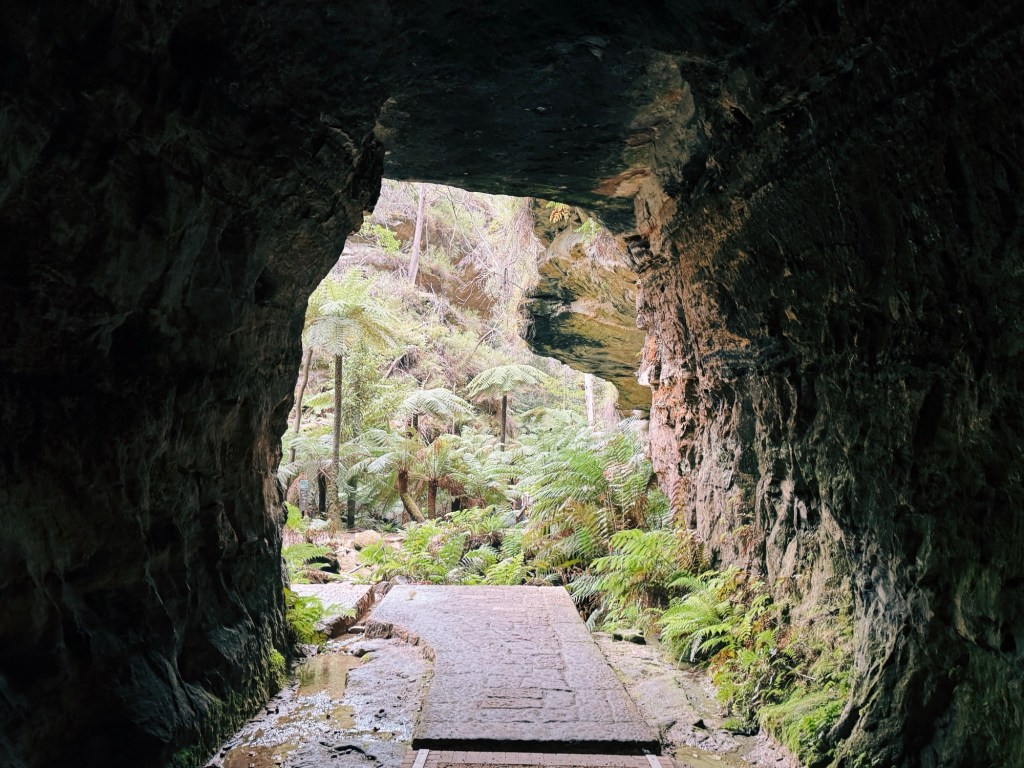
The Glow Worm Tunnel Road soon redeemed itself with massive rock formations (pagodas) stacked like nature’s own skyscrapers. Cars crawled by, passengers craning their necks to catch a glimpse of the scenery, while on the bike, I felt completely immersed in my surroundings. The road itself twisted through the rocks, then suddenly, cut right through the middle with a dark tunnel entrance. I almost thought this was the Glow Worm Tunnel, then realised there is no way in hell cars would be allowed to drive through it.
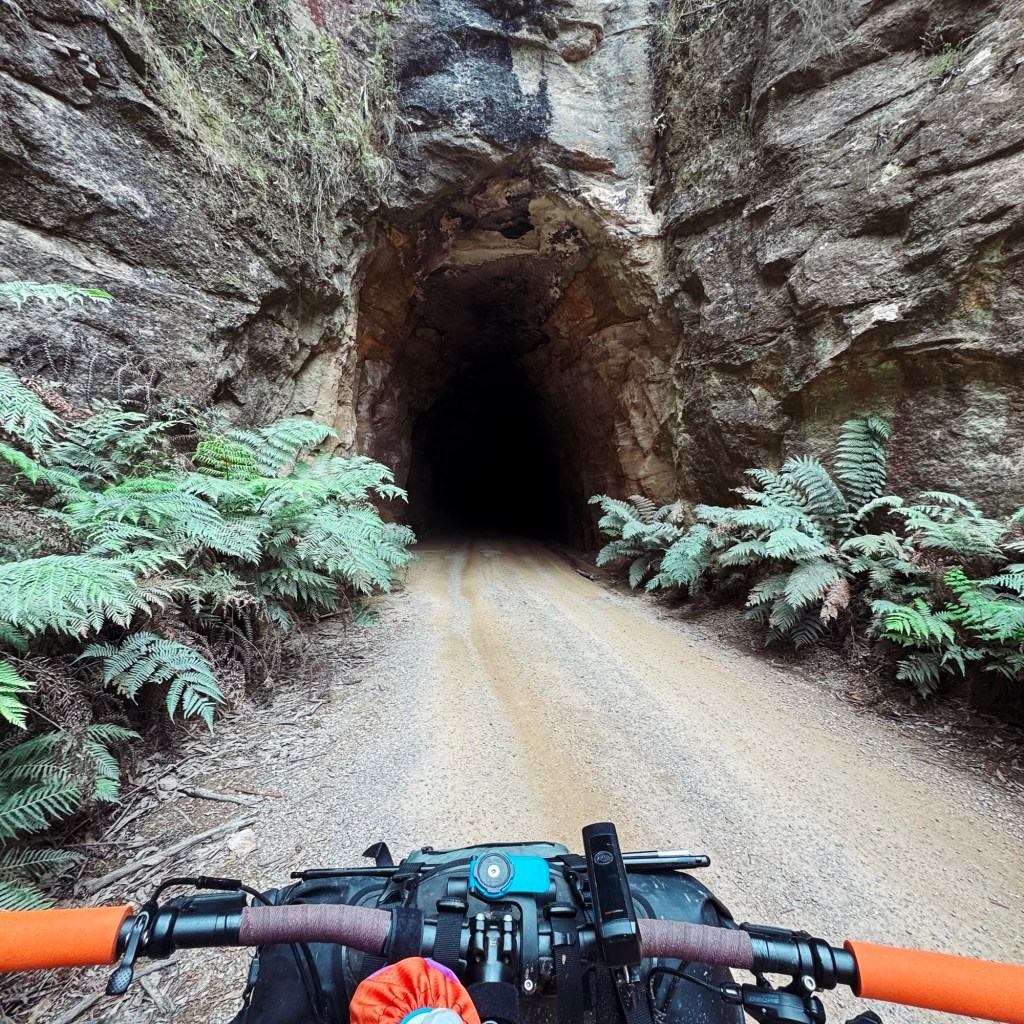
Rolling into the bustling Glow Worm Tunnel carpark, the fun hit a brief speed bump with cycling not permitted on the Glow Worm Tunnel Walking Track. So it was time to dismount and walk the bike, hoisting it through a few awkward staircases, and stepping stones, before entering the legendary tunnel itself. Sparkling like a miniature galaxy, the tunnel was phenomenal. Use your red bike lights, and shine them on the ground to least disrupt the glow worms, or turn the lights off entirely, let the hand rail be your guide, and walk through in complete darkness to experience the magic of the glow worms.
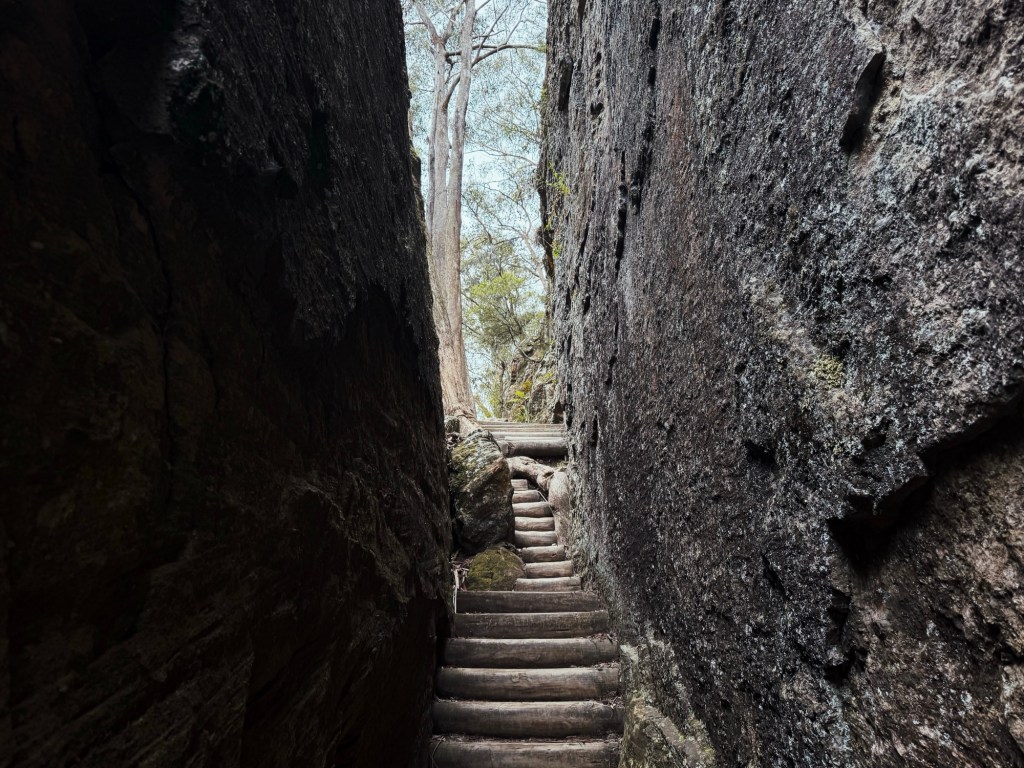
Walking the bike on the other side of the tunnel, views soon opened to the impressive rock formation known as ‘The Donkey’. The next section is quite narrow, with some rock falls, and a lot of steps to carry the bike. Finally the single track joined up with Old Coach Road for the fast decent down to the Wolgan River.
Optional Alternative Route
For those who’d rather avoid the hike-a-bike through this section, leave the bike behind at the Pagoda Track turn-off, check out the Glow Worm Tunnel, then backtrack and continue along the Pagoda Track, which connects with Old Coach Road. Descend Old Coach Road and rejoin with this route just before the Wolgan River.
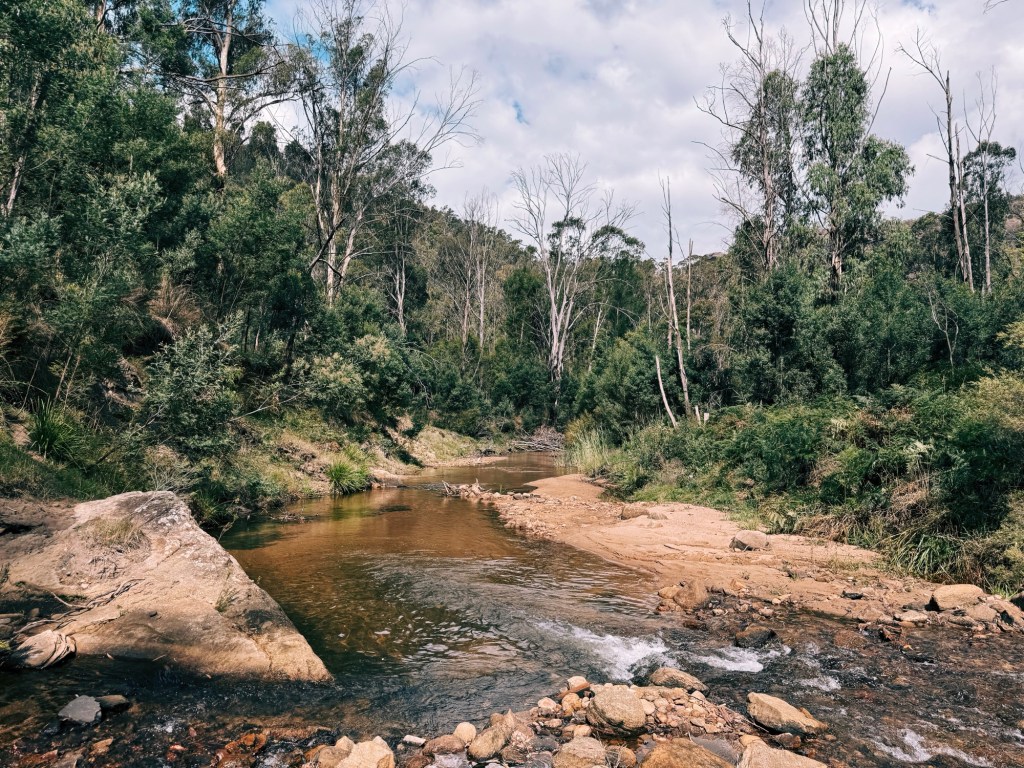
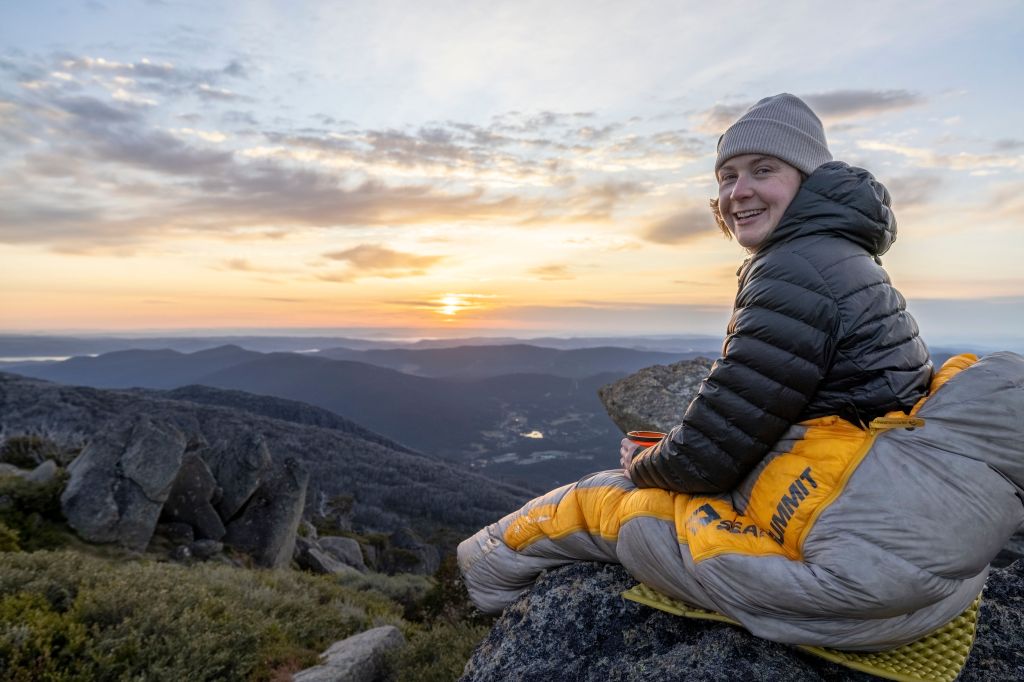
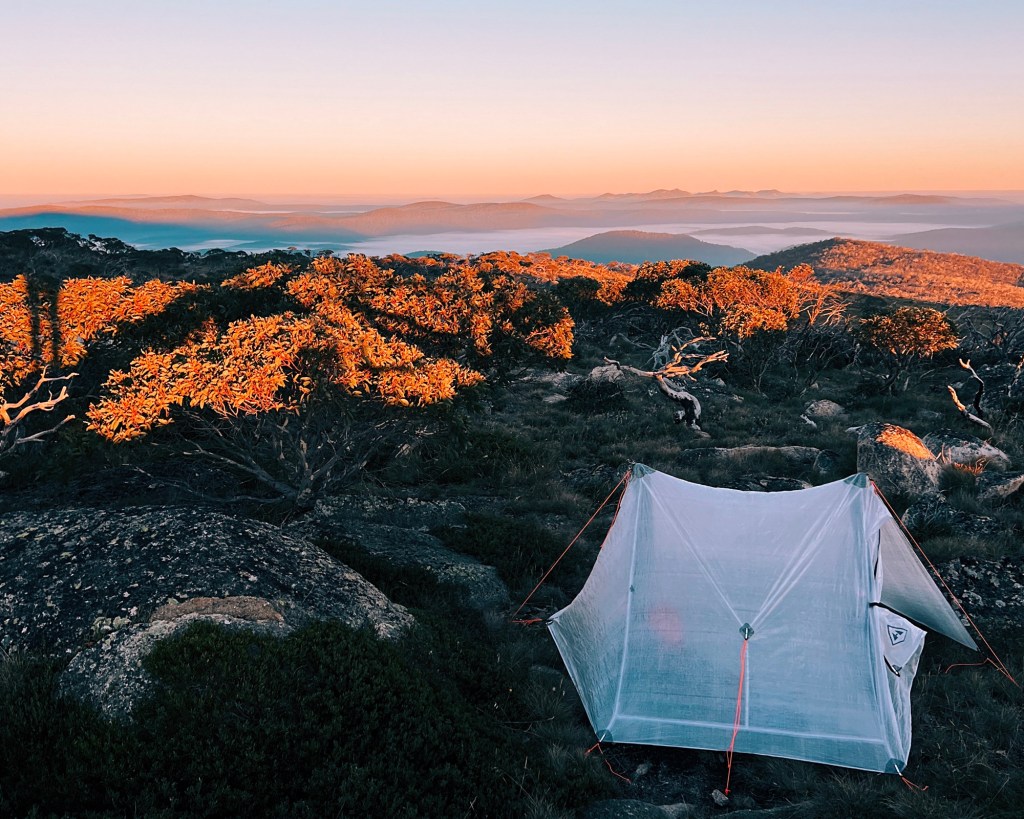
Turning right onto Wolgon Road, this gravel was the stuff dreams are made of. The perfect playlist turned the ride into something almost cinematic. A monitor lizard made a brief appearance before clawing up a tree. Eventually, the route led straight into Newnes Campground, quite possibly one of the best campgrounds in the Blue Mountains. Upon arrival, not another soul was in sight. A quick dip in the river sealed the deal: this place was pretty special. If I had the time I would have loved to spend an extra day here, with plenty of trails around to explore on foot.
Day 2: 60km, 1300m Elevation Gain
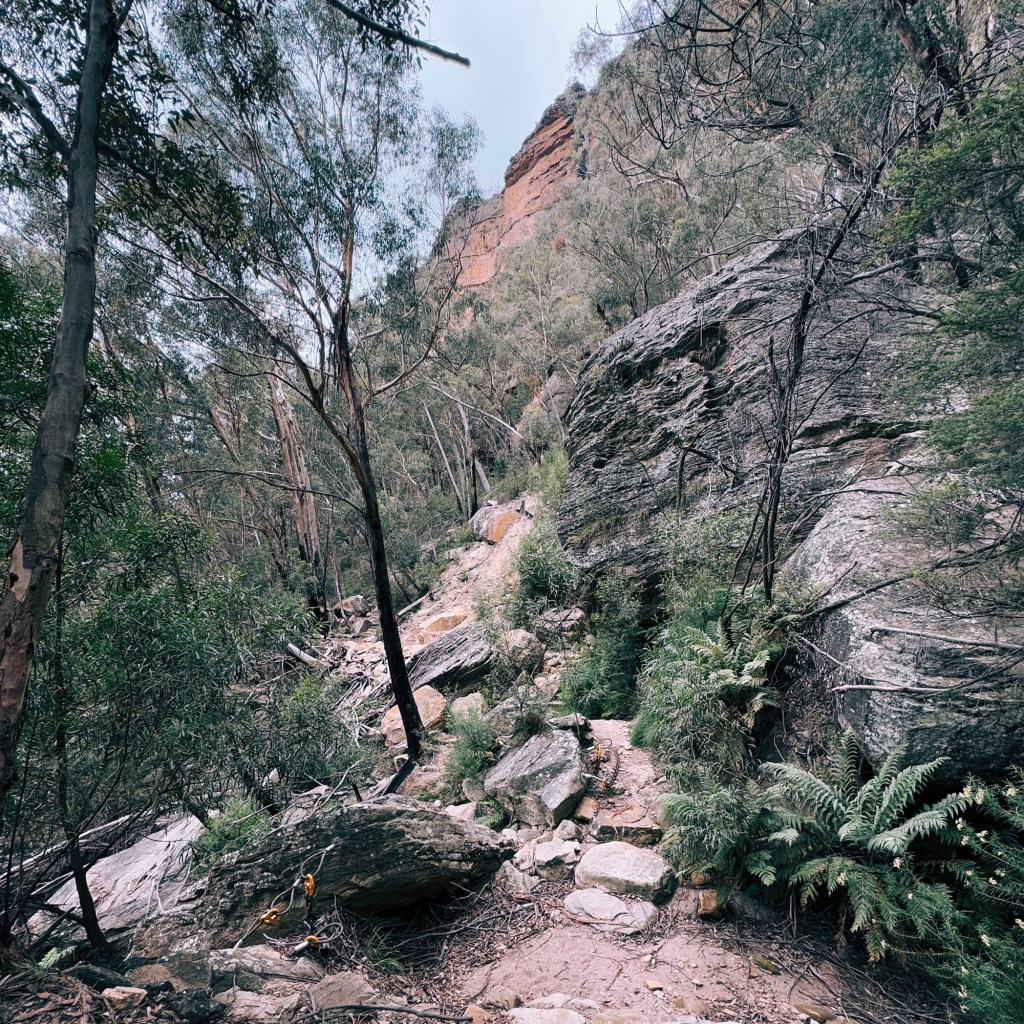
With a few detours planned, the morning kicked off early, the ride back on champagne gravel bathed in golden light. A sleepy wombat trundled past, oblivious to my passing wheels. Old Coach Road delivered a relentless climb; steep, consistent, and featuring a few mandatory hike-a-bike sections. The higher the trail climbed, the more incredible the views became. Towering rock walls, sprawling valleys, and the ever-present pagodas framed the route.
Past a locked gate, the scenery opened up, revealing clusters of rock formations scattered across horizon. Through the Old Coach Road Carpark, I was thankful there were no cars this early in the morning. Just empty roads and that perfect champagne gravel. Eventually leading back to the Glow Worm Tunnel Road intersection, I only stayed on it briefly before veering onto the quieter side trail, then linking up with Camp Road. From there, another detour onto Powerline Road ensured even fewer encounters with vehicles.
A stop at the Bungleboori picnic area (still under development) across from the Northern Lost City gave me a moment to refuel, before turning onto Old Bells Line of Road, passing back through the quarry before veering off for one final side quest.
Detour: Goochs Crater
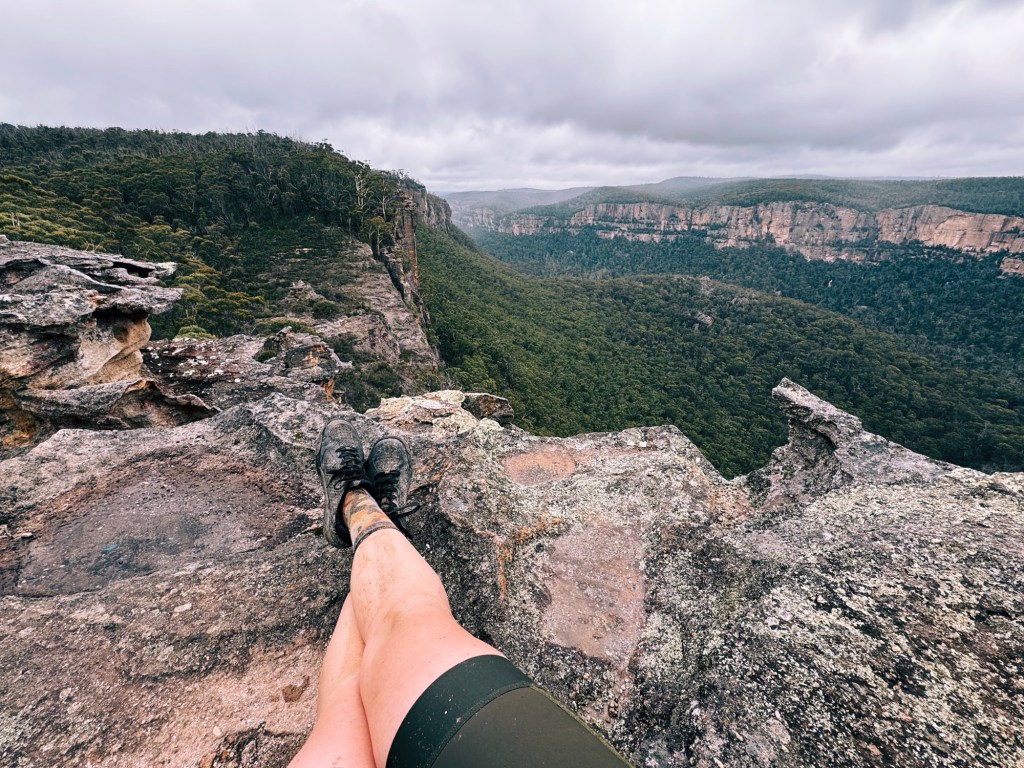
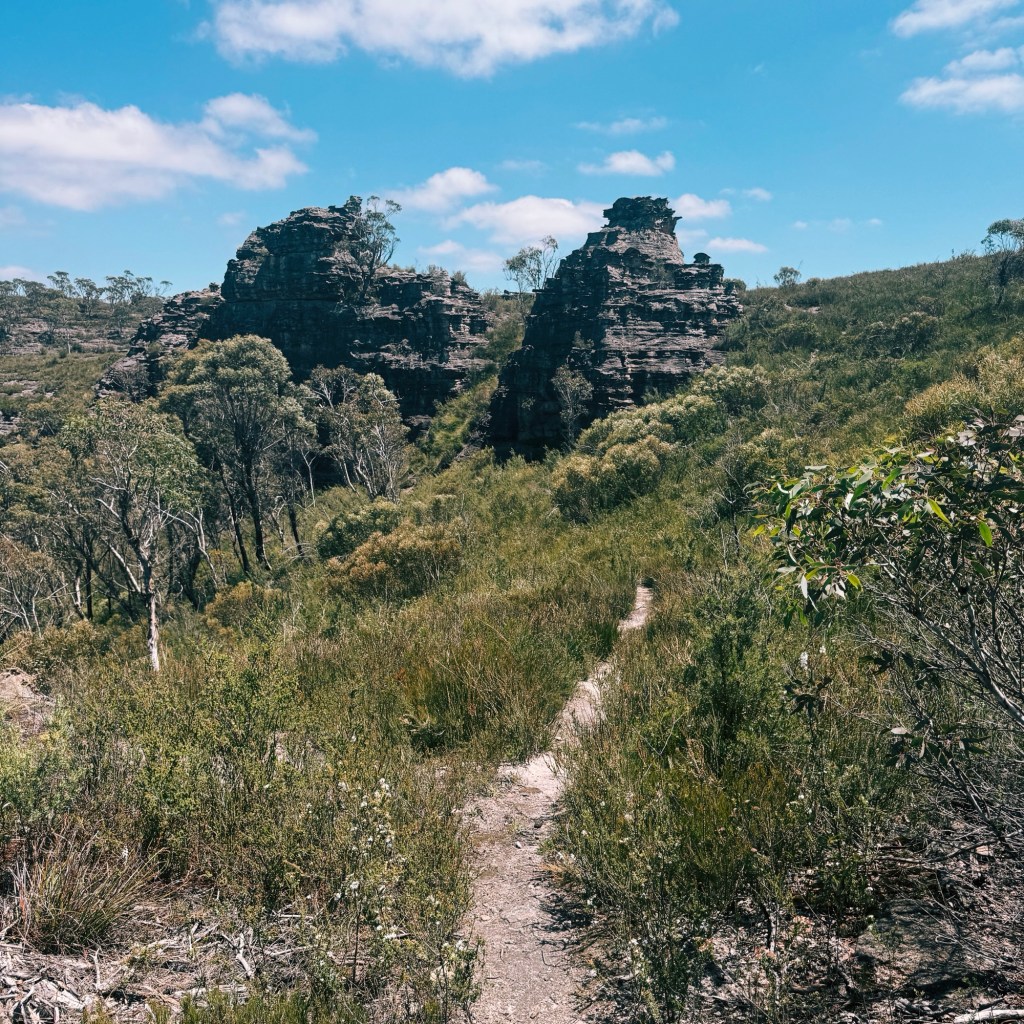
A turnoff at Bald Hill presented an optional climb, said to offer amazing views, but the real gem was waiting down Dumbano Fire Trail. The track twisted over undulating terrain, with oversized puddles from yesterday’s downpour, until I hit an unnamed fire trail that led to the start of Goochs Crater Walking Track. I left the bike behind once more, knowing the last stretch had to be tackled on foot. The path was a little tricky to follow, but after a short two-kilometre hike, I reached the end at a set of Pagodas, their sheer walls surrounding the lush crater below.

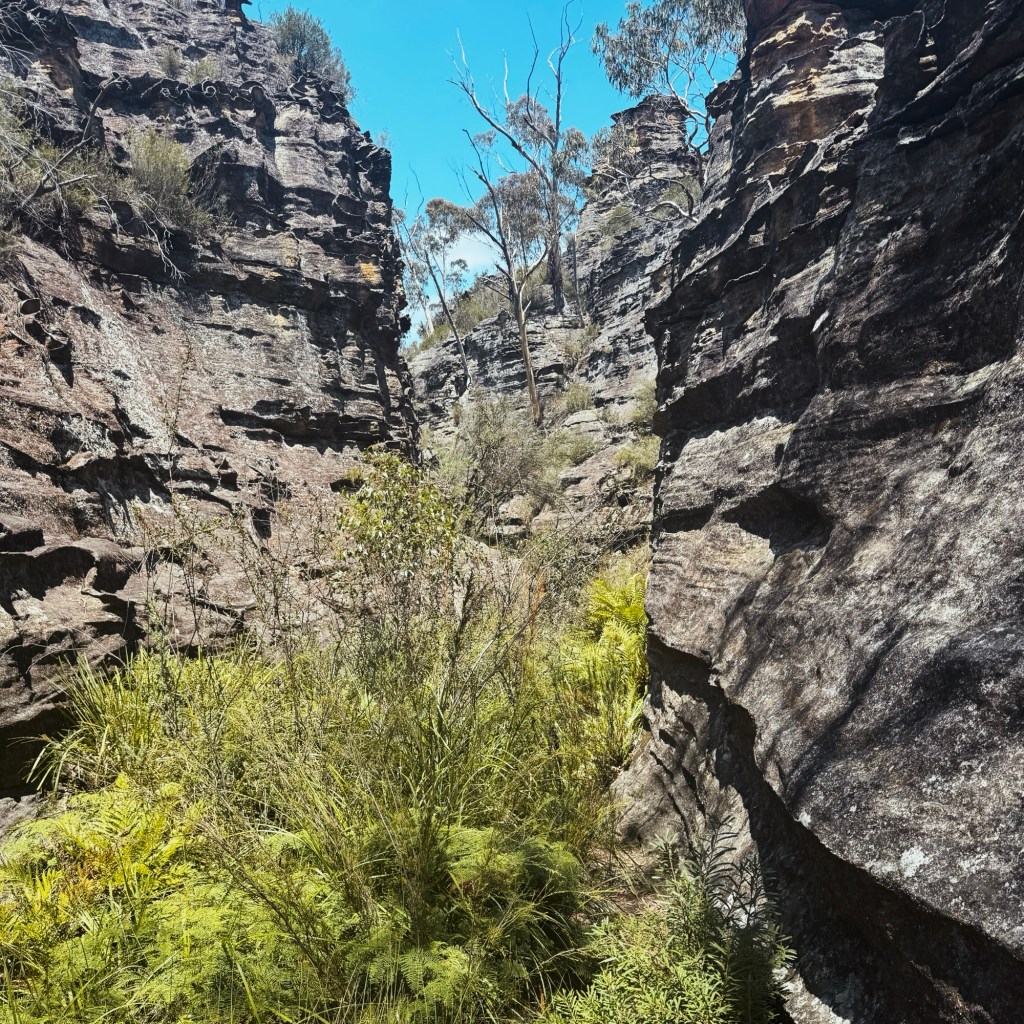
Detour: Billabong Canyon
Spotting another icon on the map, “Billabong Canyon”, I decided to explore. A quick bushwalk later, I found myself looking down at a narrow waterfall within the canyon. Without ropes, I decided to head back. When I regained phone service, I did a bit of research and realized I’d overshot the path into Billabong Canyon. The actual track goes up and over the canyon walls before winding its way down into the canyon on the other side (according to these track notes)
Backtracking to the bike, the final ride back to the car was smooth, legs tired but mind buzzing with the sheer thrill of adventure. What started as a reluctant, rain-soaked gamble had turned into an unforgettable ride.

Tips for the Glow Worm Ride
Bike: A gravel bike or hardtail is ideal (dual suspension would be overkill IMO). I wouldn’t ride this route on anything smaller than 40mm tires (I had 50mm).
Phone service: I had Optus phone service the entire trip, except for Wolgan Valley. Always bring a form of emergency communication device, just in case.
Closures: Check for park closures so you don’t miss out on side trips like I did.
Water: You can refill at the dams on Camp Road, streams on the Glow Worm Tunnel Walking Track and the Wolgan River, but otherwise, the route is fairly dry. Filter or purify everything!
Wildlife: I didn’t see any snakes, but they’re always around. Bring a snake bandage, and know how to use it.

Disclaimer: Content on Path & Pedal is for general information and inspiration only. All route guides and trip reports are based on personal experience and research at the time of writing. Conditions, access, weather, and regulations can change. Always check official sources and use your own judgment. Outdoor adventures carry risk, and Path & Pedal accepts no liability for injury, loss, or damage.


Leave a comment