Te Araroa (TA) Trail is a 3,000 kilometre thru-hike from the top of Aotearoa (New Zealand) to the bottom. For me, this epic adventure was a mix of incredible highs and unexpected lows. What I expected to be a seamless journey through jaw-dropping scenery turned out to be far more complex (but also far more rewarding) than I ever imagined.
Now, two years after completing it on March 10, 2023, here’s my guide and honest take on the TA.

Skip to:
- Acknowledgement
- What is Te Araroa
- Getting to the Northern Terminus
- Getting to the Southern Terminus
- Best Time to Hike Te Araroa
- How to Resupply on Te Araroa
- Where to Refill Water on Te Araroa
- Where to Stay on Te Araroa
- How to Navigate on Te Araroa
- The Best Sections of Te Araroa
- The Best Side Trips on Te Araroa
- Biking on Te Araroa
- What to Expect on Te Araroa
- Final Thoughts
Acknowledgement
The Māori people of Aotearoa, hold the manu whenua (ancestral authority) over the lands this trail passes through. Te Araroa Trail was officially established in 2011 by the Te Araroa Trust, a non-profit organization dedicated to creating and maintaining the hike. The TA exists thanks to the hard work of volunteers, local councils, and the Department of Conservation (DOC), along with the generosity of private landowners who allow access through their properties.
While I’ve shared both the highs and lows of my experience, any criticisms in this article come from a place of transparency, not complaint. The work that goes into keeping this trail alive through maintenance, reroutes, and support is immense. I have nothing but appreciation for those who make it possible. From the trail angels offering kindness along the way to the track builders carving out the path; thank you! Your efforts make this journey one that so many of us will never forget.
What is Te Araroa?
Te Araroa (TA) is a long-distance trail spanning over 3,000 kilometres, stretching the entire length of New Zealand. It begins at Cape Reinga Lighthouse, the northernmost point of the North Island, and ends at Stirling Point in Bluff, the southern tip of the South Island.
Often compared to world-renowned trails like the Pacific Crest Trail (PCT) and the Appalachian Trail (AT), the TA is still in its infancy and continues to evolve. Unlike these well-established thru-hikes, the TA is not one continuous pathway. Despite its name, ‘The Long Pathway’, it stitches together pre-existing trails across New Zealand, and at times, it feels exactly like that. Rather than a seamless thru-hike, the route can feel a little disjointed.
The trail is a mix of terrains: singletrack, beach walking, 4×4 tracks, gravel roads, and paved roads. While the TA is relatively short compared to other thru-hikes, its diversity is unmatched. The landscape shifts dramatically from lush forests and sweeping coastlines to cityscapes, towering mountains, and farmland. Sometimes, you’ll experience all of these within a single day.

Getting to the Northern Terminus (Cape Reinga)
From Australia, I flew into Auckland before catching a connecting flight to Kaitaia with Barrier Air, which cost around $150 in 2023. The plane was tiny, seating only about six people it felt more like a scenic flight. Flying over the very landscapes I’d be hiking for the next few months was surreal and the perfect way to kick off my adventure.
I spent the night in Kaitaia, booking a cheap Airbnb to resupply and enjoy some much-needed alone time before starting the trail. The next morning, I caught a bus to the trailhead at Cape Reinga with a company called Sand Safaris Dune Rider, which cost about $100. Without giving much thought to the name (facepalm), I didn’t realize I’d booked a full-blown tourist bus. It cruised along Ninety Mile Beach before detouring into the dunes for some unexpected sandboarding (which, to be fair, was surprisingly fun) before finally dropping me off at Cape Reinga.
If you’ve got time to spare, hitchhiking is a popular option, though it can be tricky to get a ride from Kaitaia all the way to Cape Reinga in one go.
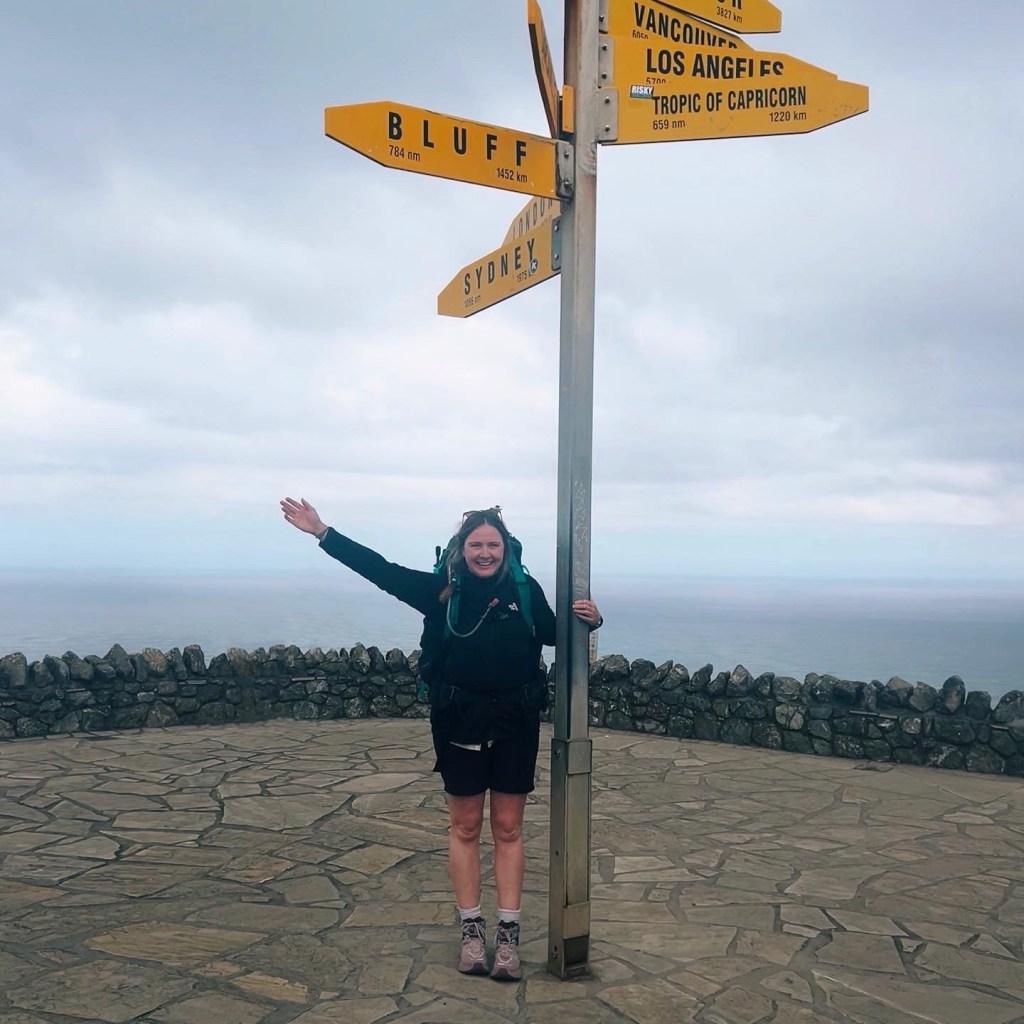
Getting to the Southern Terminus (Bluff)
When we arrived in Invercargill, we took a well-earned rest day before the final push to the finish. This gave us time to organize a bus shuttle to pick us up from Bluff. We managed to fill an entire mini-bus, and it cost about $20 each. Someone I met on the trail handled the booking, so unfortunately, I have no idea what company we used.
After finishing, I flew from Invercargill to Wellington the very next day, with Air New Zealand (using flyer points), then from Wellington back to Australia.

Best Time to Hike Te Araroa
It took me 115 days to hike Te Araroa SOBO (southbound), starting on November 11th and finishing on March 10th. I preferred hiking SOBO, as the North Island felt like a warm-up for the South, saving the best for last. For those tackling both islands, October or November is the usual starting window, with December being the latest recommended start to avoid hitting the South Island when the mountain peaks are covered with snow. If you’re only hiking the South Island, most people start in December or January.
The 2022–2023 season was one of the busiest yet, leading to overcrowded huts and campsites. Most people hike SOBO, so starting earlier in the season can help avoid the crowds or you could opt to hike NOBO instead.
How to Resupply on Te Araroa
Food resupply on the TA is pretty straightforward. In the North Island, I passed a supermarket every 1–3 days, making it easy to stock up. The South Island is a bit more spread out, with towns roughly every 3–6 days. My longest food carry was eight days through the Richmond Ranges.
I arranged three food drops on the South Island, posting them ahead from Wellington to St Arnaud (Nelson Lakes), Arthur’s Pass, and Boyle Village. In hindsight, they weren’t really necessary. I could have carried extra food to cover the distances, and I ended up hitching off-trail for a rest day at Boyle Village anyway. Hitchhiking into towns for food was common and relatively easy.
The real challenge wasn’t finding food, it was adjusting to the higher cost of groceries in New Zealand. If you’re planning your TA adventure, budget for this!

Where to Refill Water on Te Araroa
Water was rarely an issue on the TA. Rivers and streams were plentiful, especially in the South Island. One Kiwi hiker I met even ditched his large water bottles down South, carrying just a 1L bottle and a cup clipped to his pack, drinking straight from streams as he walked. Personally, I filtered everything. I’ve learnt from experience that Giardia on trail is not fun.
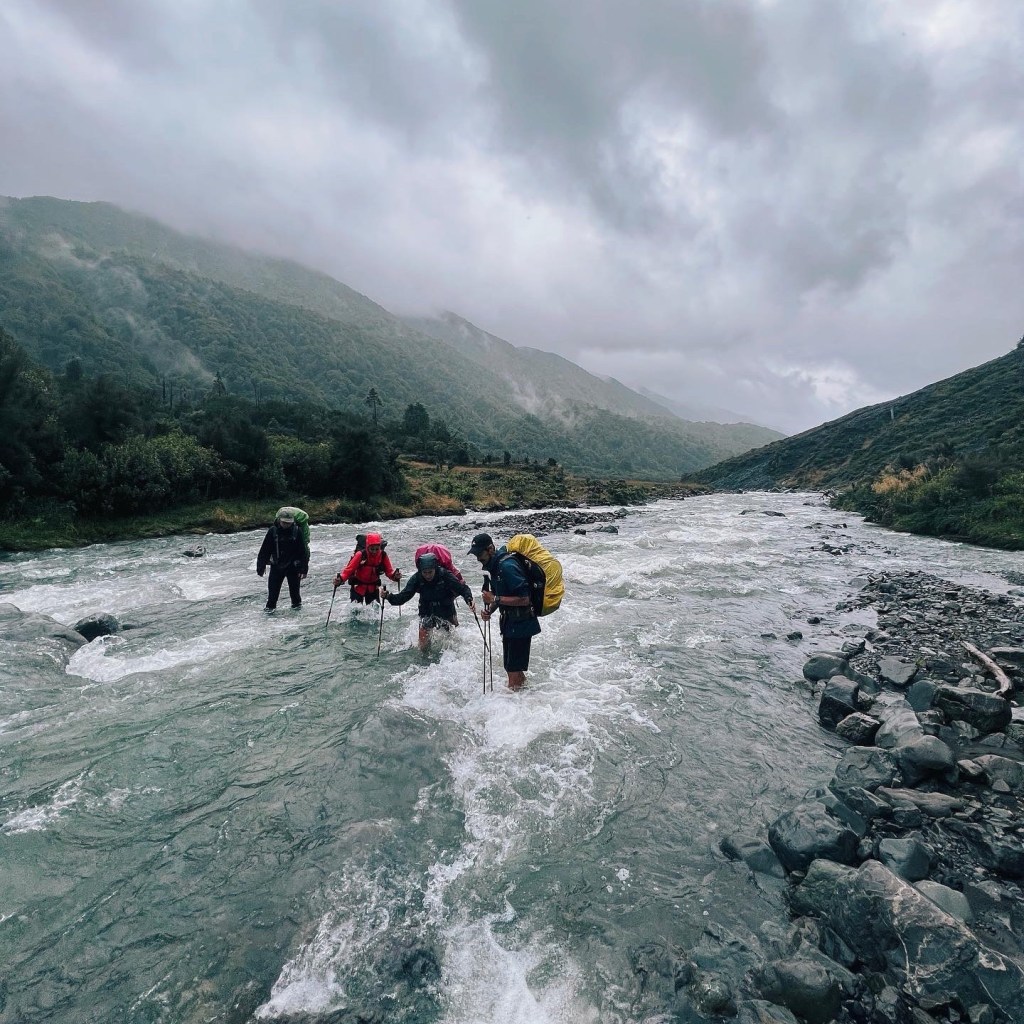
However, river crossings posed their own challenges. Two major rivers on the South Island, the Rakaia and Rangitata, require either very low water levels to ford safely or an expensive shuttle ride to bypass. While it’s tempting to push through to avoid the cost, safety should always come first. Many hikers skipped these sections entirely to avoid the double expense of getting around both rivers individually.
It’s also wise to carry an extra day of food as rivers can rise fast. Before Goat Pass, about 20 of us got stuck in a hut after heavy rain caused the river to flood. The next section involved multiple crossings, so we had no choice but to wait it out. Watching the river rise from Locke Stream Hut was incredible, but it was a good reminder of how unpredictable conditions can be.
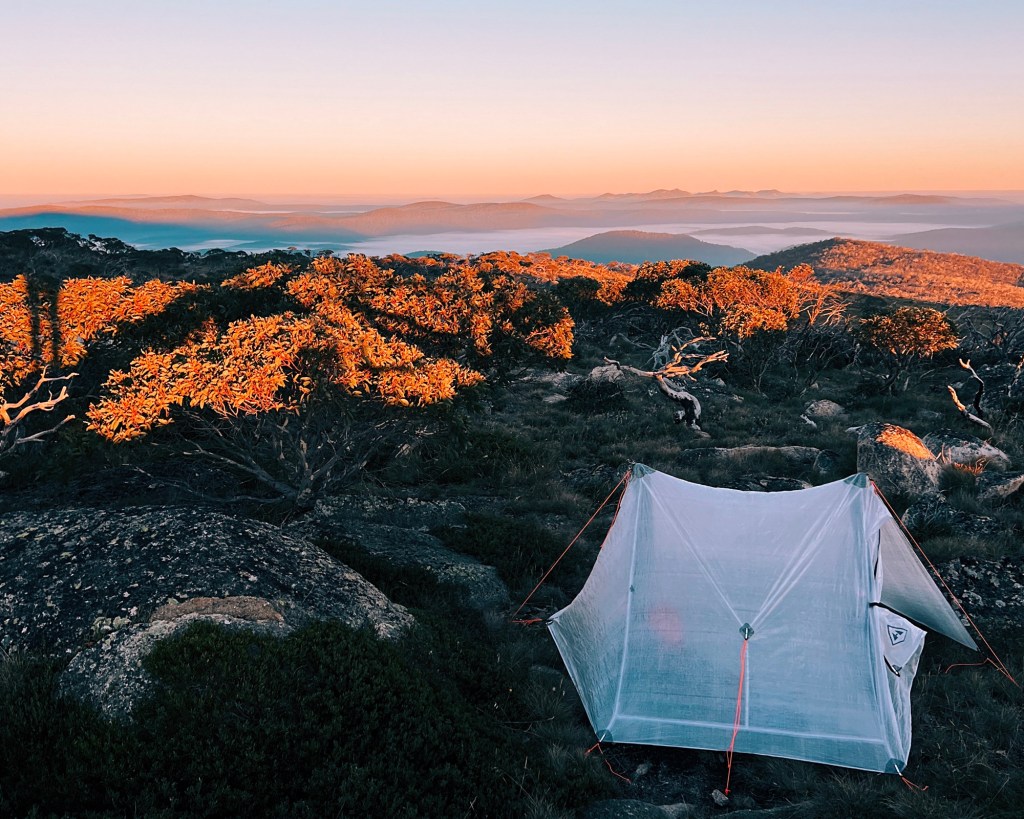
Where to Stay on Te Araroa
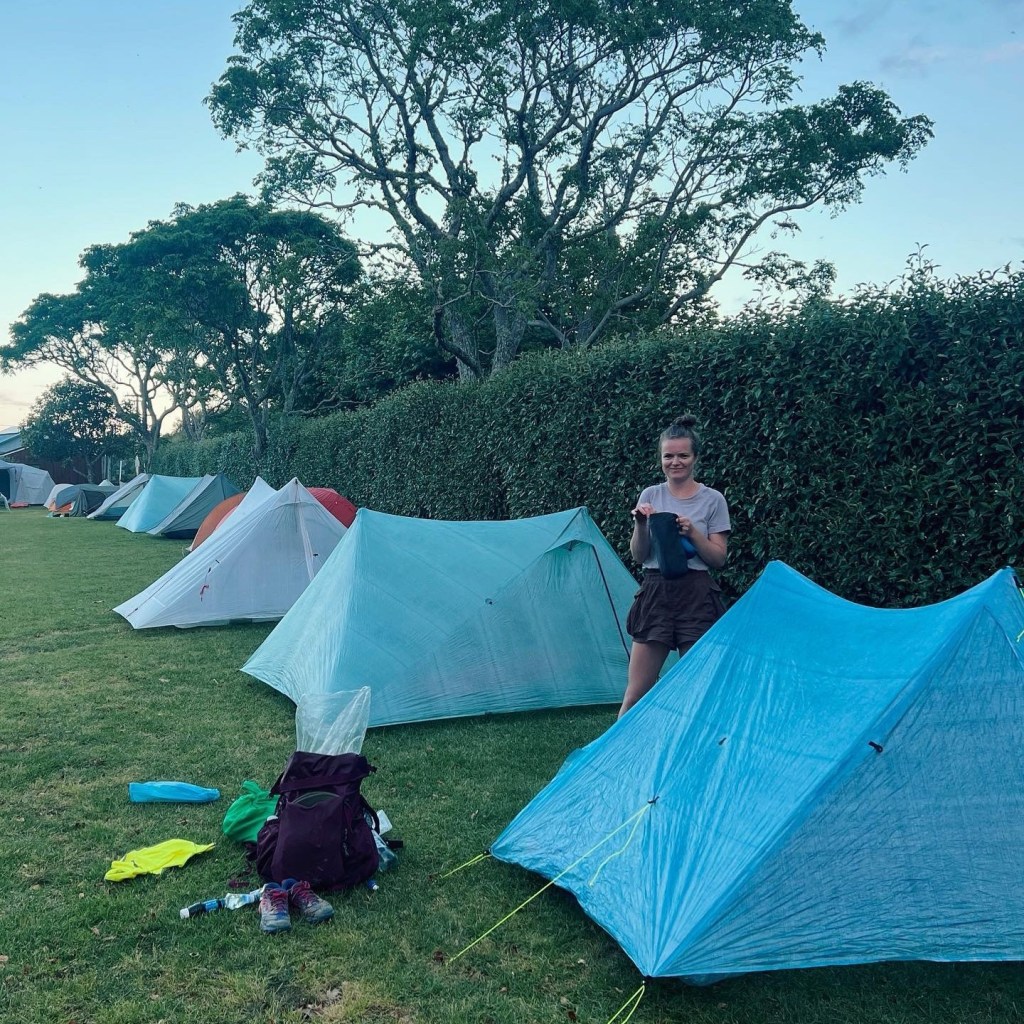
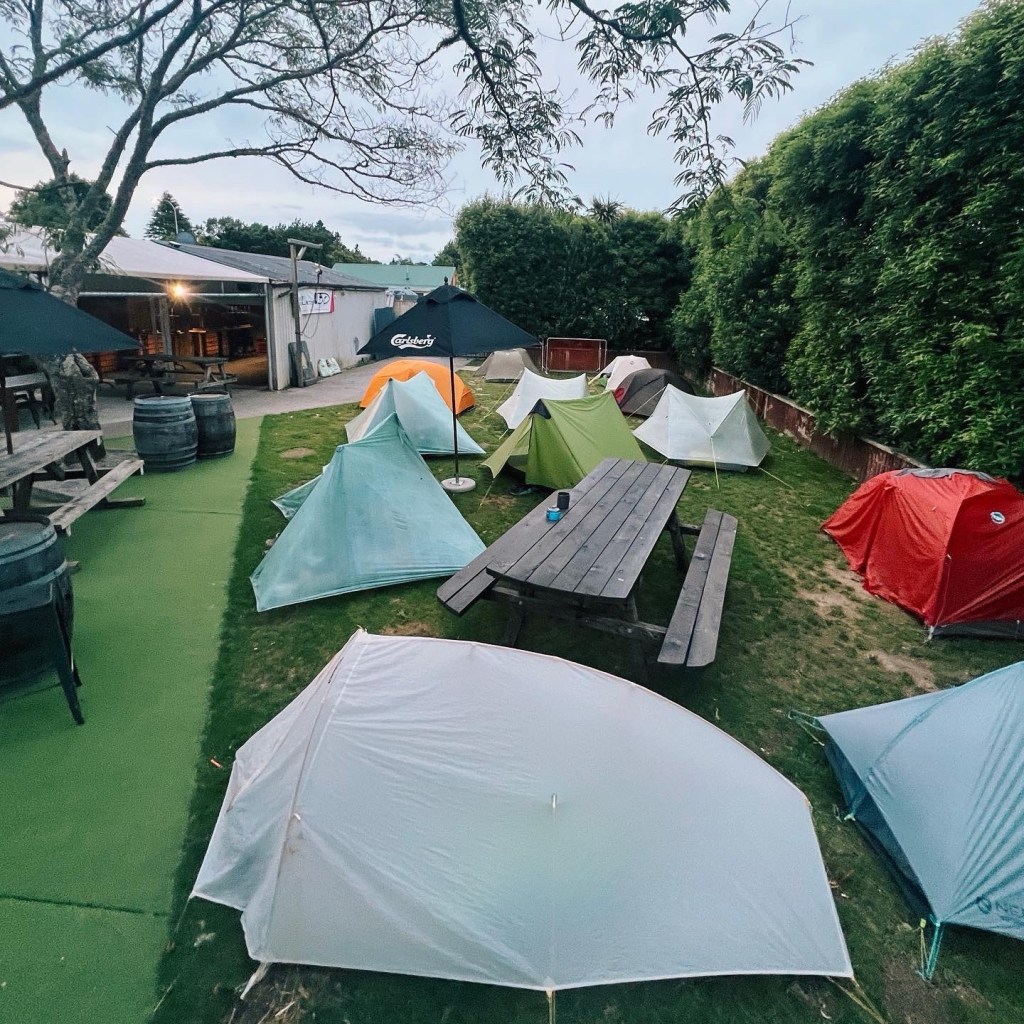
Accommodation on the TA varies greatly between the North and South Islands, offering a mix of caravan parks, DOC campsites, DOC huts, private huts, freedom camping, trail angels, and hostels or hotels. In the North Island, freedom camping spots were scarce, and caravan parks became the main accommodation option but they can be pricey, with some charging $35–$45 NZD per night for an unpowered site.
The South Island, on the other hand, has far more huts available through the DOC Backcountry Hut Pass ($160 NZD). Be aware that some huts have limited tent space around them, meaning you may end up sharing close quarters with fellow hikers. One night, just past Wanaka at Fern Burn Hut, we crammed 35 people into the hut as snowstorm rolled in. The snoring was absolutely horrendous.
Trail Angels
Some sections of the trail rely on trail angels: generous locals who open their homes to TA hikers. For example, between Pahautea Hut and Waitomo, there’s a 53km stretch with no official accommodation, aside from a few kind-hearted farmers who let hikers stay on their property.
Trail angels were some of the most welcoming and generous people I met on the TA. Many had a personal connection to the trail; whether they’d hiked it themselves or knew someone who had. The Te Araroa Trust advises them to charge koha (a donation) for their services, but with the sheer number of hikers coming through, many found it hard to keep up. Some hosted 10 or more hikers a night, which isn’t exactly sustainable long-term.

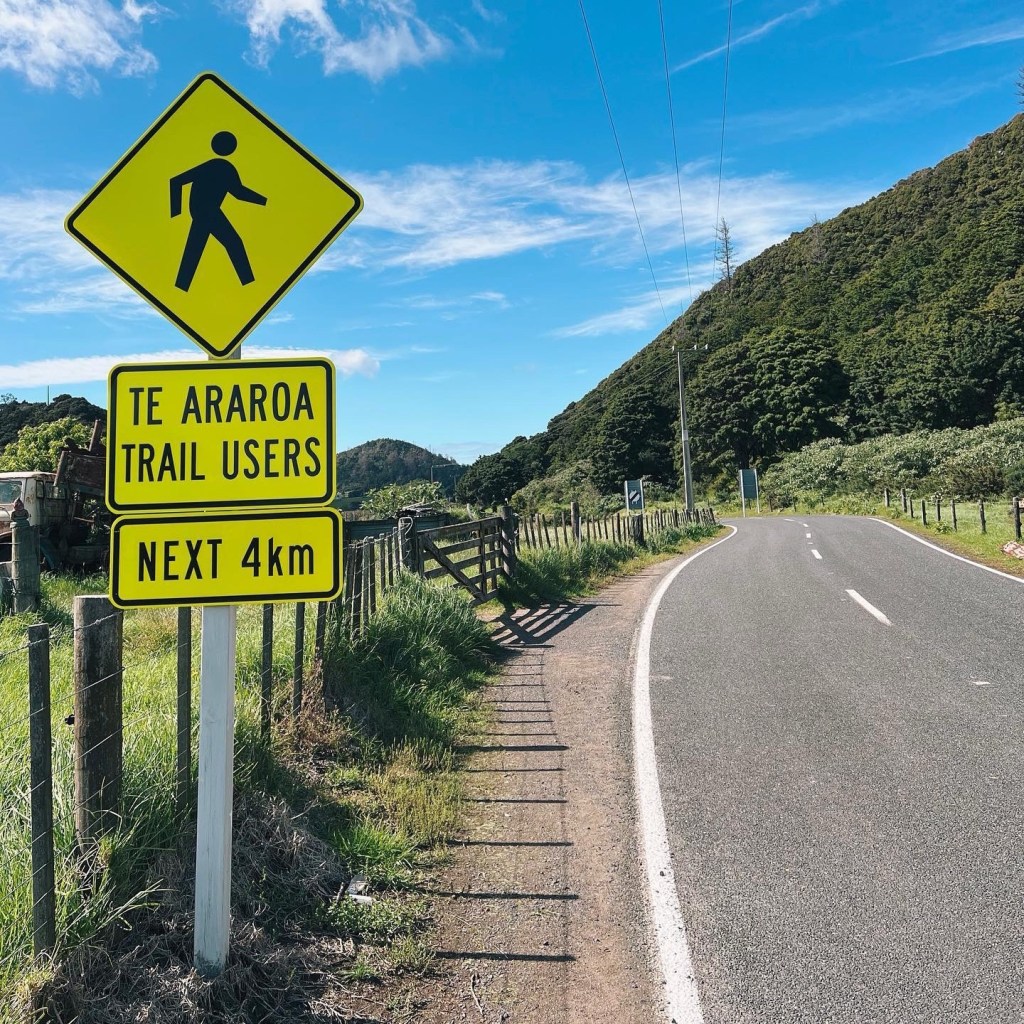
How to Navigate on Te Araroa
The trail is well-marked, and I relied mostly on my iPhone for navigation, using an app called FarOut; the go-to for most thru-hikers worldwide. Other hikers can leave comments on landmarks, rate accommodations, and even share some pretty hilarious notes about the drop toilets.
Most signage was clear and reliable, but at higher altitudes, bad weather sometimes made trail markers hard to spot. I carried a GPS as a backup in case my phone ran out of battery (which, of course, it did).
Phone Service and Safety
Phone service exceeded my expectations, but I still recommend carrying a PLB or satellite communication device for emergencies. It’s always better to be over-prepared than caught off guard. Some hikers just relied on Wi-Fi, while others picked up a NZ SIM card. I’m with Vodafone and was able to set up my phone to work as usual over there, as well as a Garmin Inreach Mini 2 for emergencies

The Best Sections of Te Araroa
If you don’t have time to walk the entire trail, these were my favourite sections:
Tararuas (North Island): I took a detour here (see ‘side-trips’) just to soak up these mountains for a little longer. Totally worth it.
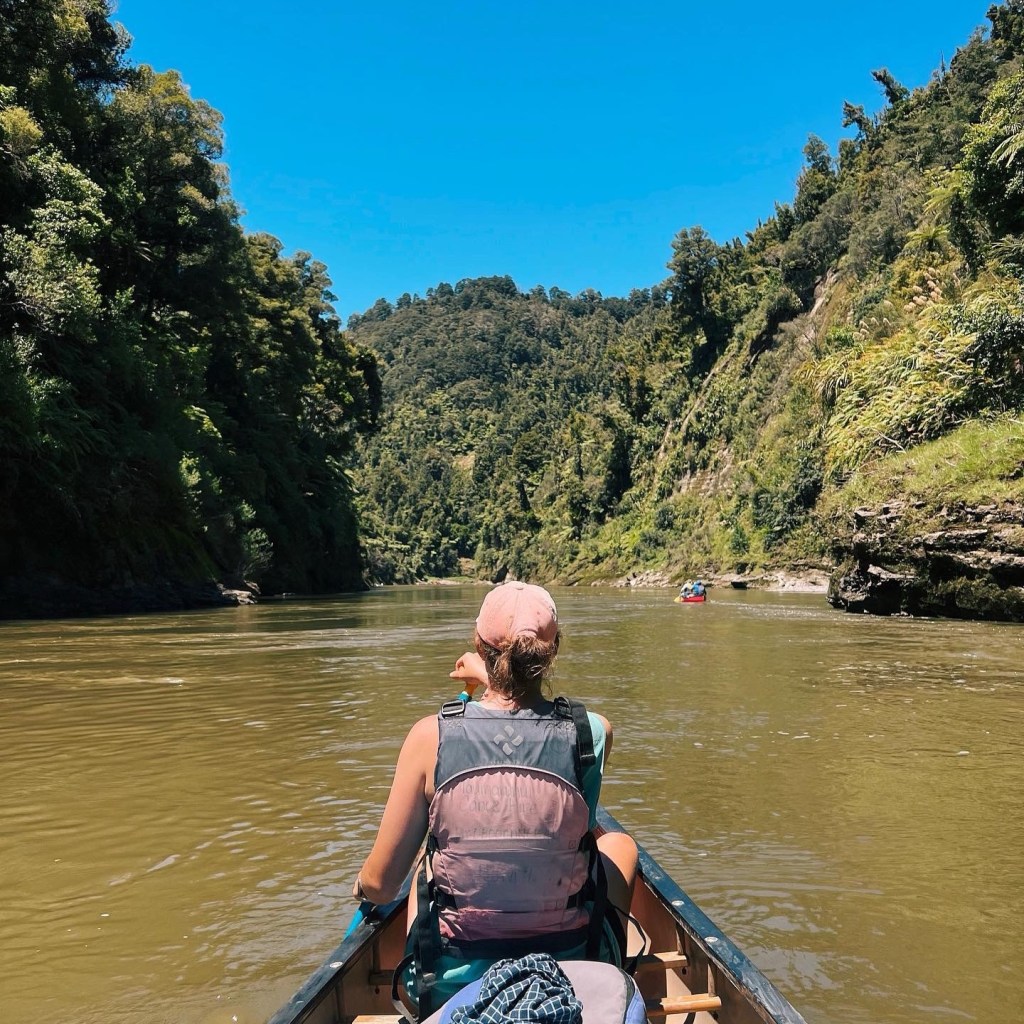
Canoeing the Whanganui River (North Island): This was my third time on the river, having family in nearby Whanganui. It’s one of New Zealand’s “Great Walks” (except not actually a walk). For thru-hikers, it’s basically a holiday as you don’t have to carry anything on your back. The detour walk to the Bridge to Nowhere is not to be missed.
Riding the Timber Trail (North Island): The official TA route hikes this section, but if you can ride, it’s way better!

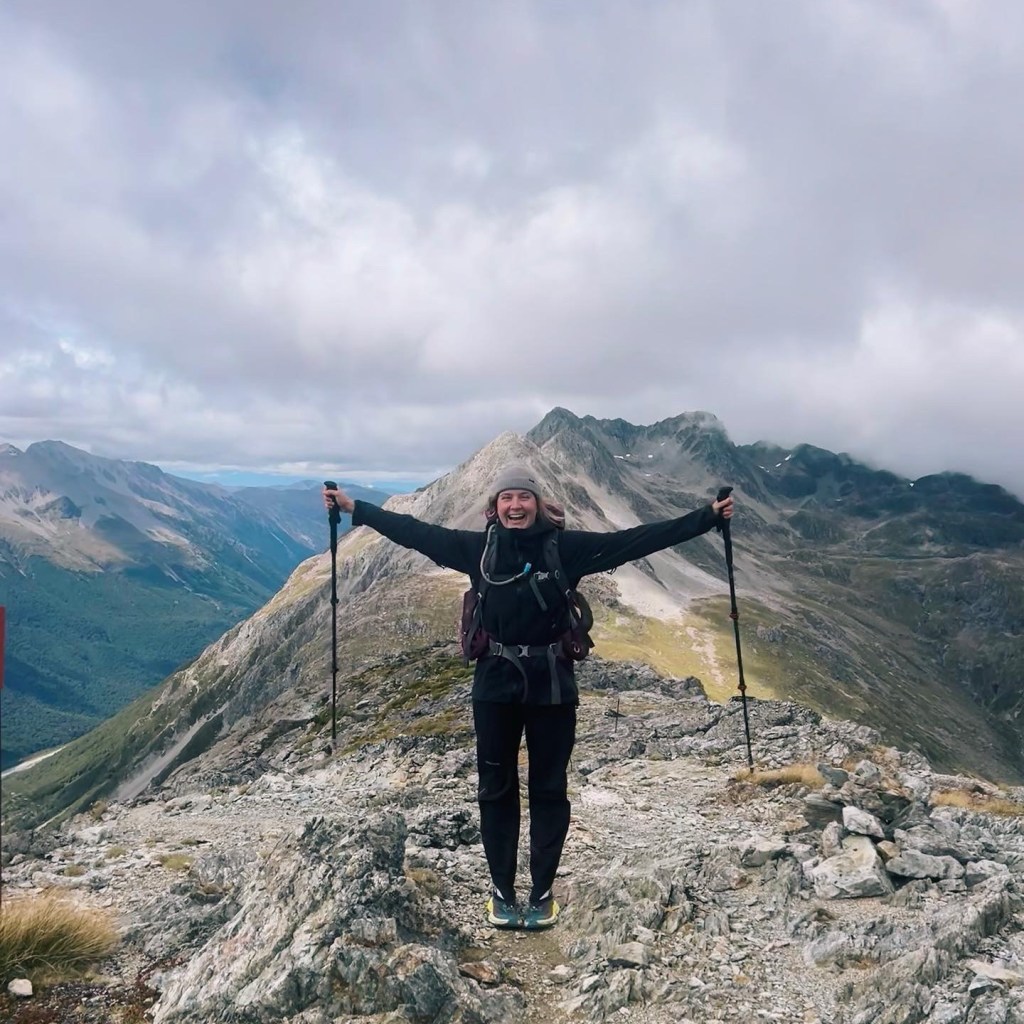
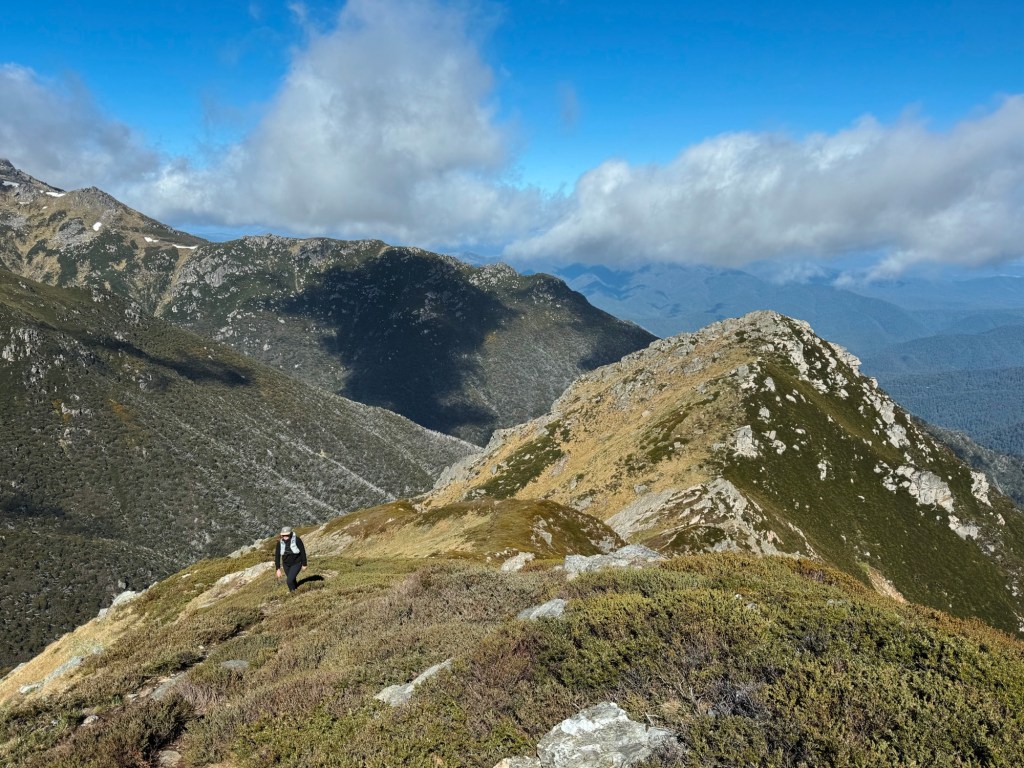
Richmond Ranges (South Island): Easily the most challenging section. Think steep scree slopes and some sketchy rock scrambling.
Goat Pass (South Island): We spotted the endangered Whio (blue ducks) along here, so obviously, I was instantly obsessed with this section.
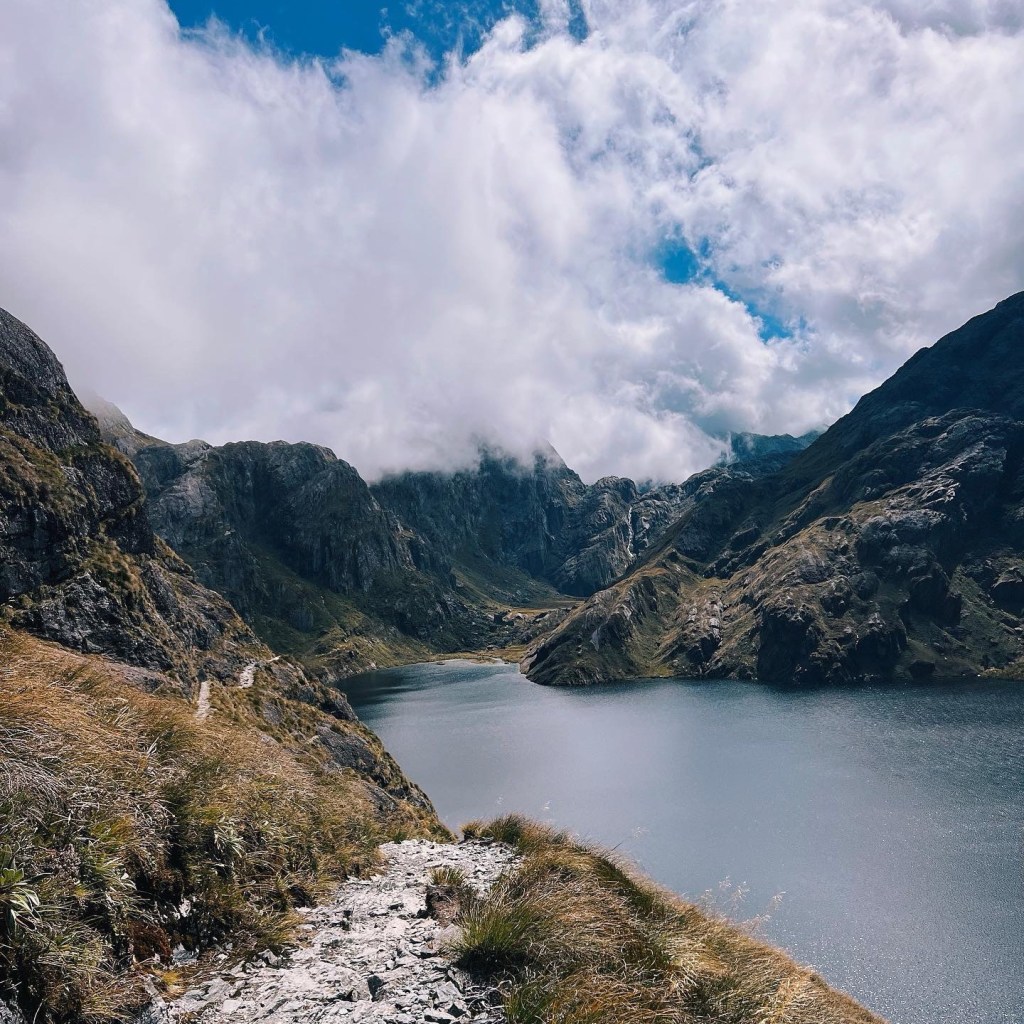
Waiau Pass (South Island): When I think of hiking in New Zealand, this section of trail is exactly what I picture: lakes, mountains, glacier fed waterfalls, forests, and even tussock plains on the other side of the pass
Motatapu Track (South Island): Some hikers took a detour on the Rees-Dart Track, and if I had endless time, I’d do both. I absolutely loved this route from Wanaka to Queenstown. A great pick for section hikers.
The Best Side Trips on Te Araroa
Some of New Zealand’s Great Walks are accessible as side trips from the TA. While these detours add to your mileage, they’re worth every extra step. I highly recommend taking some time off-trail to explore northern New Zealand’s gems, as the official route skips over a lot of them. These are just a few of the side trips I did (and there are plenty more I didn’t get around to):
Round the Mountain or Tongariro Northern Circuit (North Island): The Northern Circuit is one of NZ’s Great Walks and requires booking ahead of time, while Round the Mountain extends the hike around Mount Ruapehu for those who want more.

Tararua Peaks Walk (North Island): Home to the iconic 70-rung ladder (not to be tempted in bad weather). We took this detour along the ridge, but when it came time to descend the ladder, the weather turned, forcing us to drop off the ridge and follow the river instead.
Routeburn Track (South Island): Another Great Walk that requires bookings, but if you’re heading SOBO, you’ll have built up some solid trail fitness by this stage and can smash it out in a day.
Greenstone-Caples Track (South Island): This connects the Routeburn back to the TA. I’d recommend taking the high route to McKellar Saddle.
Angelus Hut, Nelson Lakes (South Island): I like to think of this as the high-route alternative to the TA around Lake Rotoiti. The hut requires bookings as it’s one of NZ’s top DOC huts (so you know it’s going to be good).
Brow Peak Ridge & Ben Lomond (South Island): Another high route. While it does mean missing the very cute Arrowtown, the ridgeline to Coronet Peak was the best I had on the entire trail
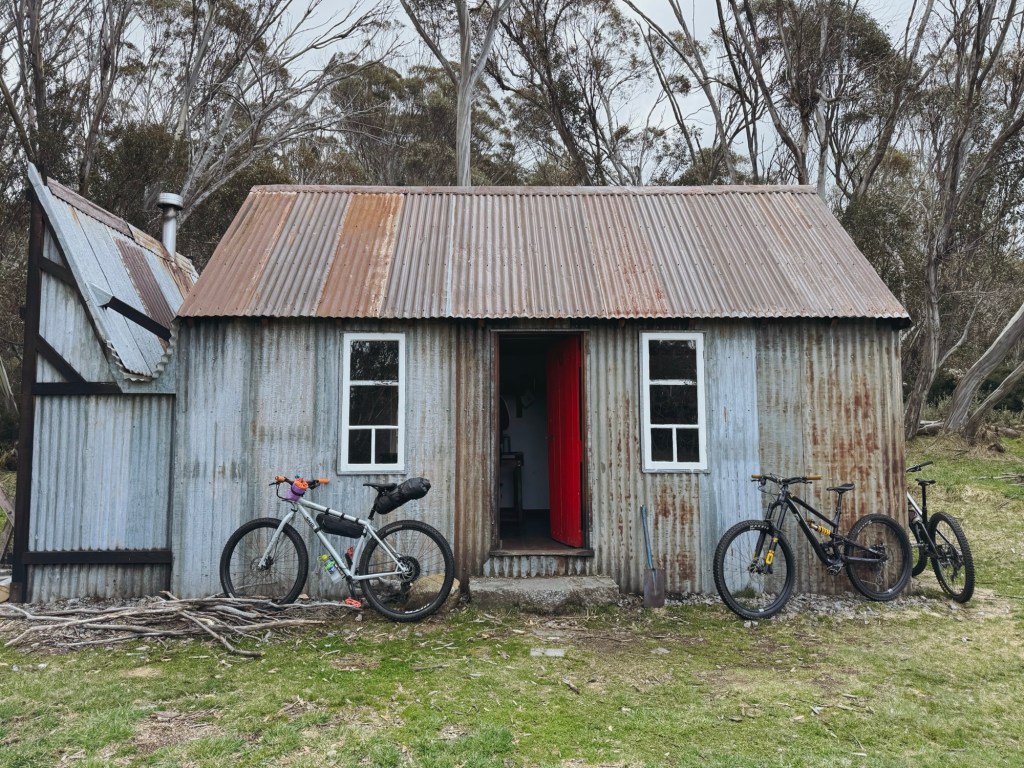
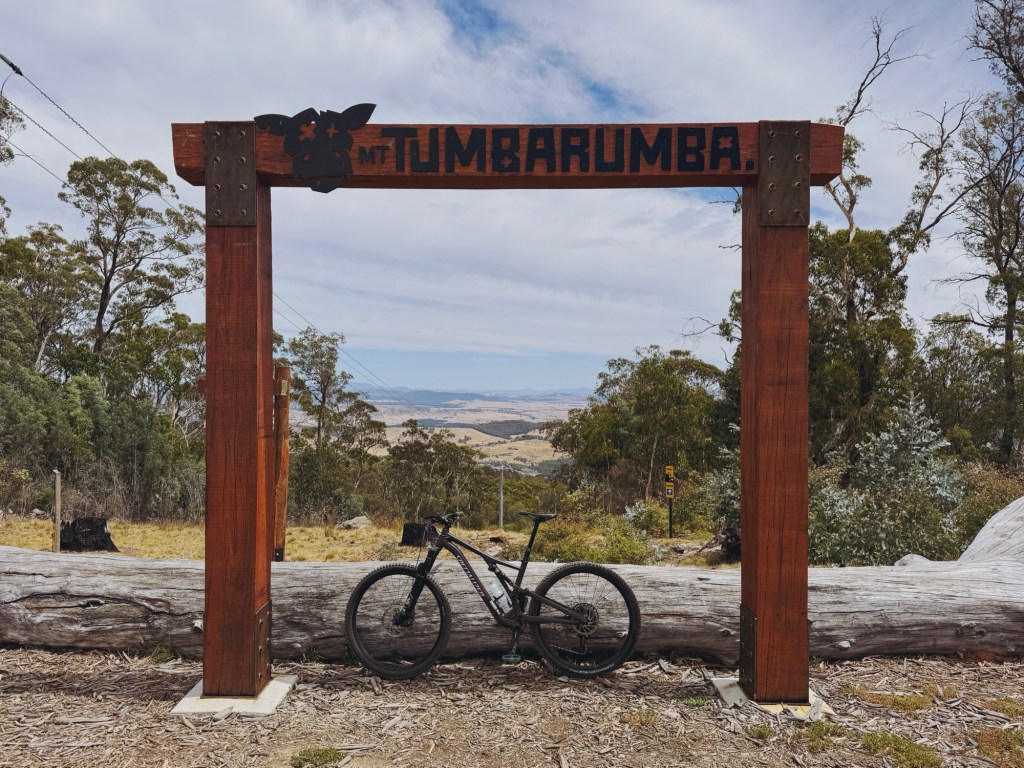
Biking on Te Araroa
We hired bikes for two sections of the TA: the Timber Trail and a stretch of the Alps to Ocean between Lake Tekapo and Lake Ohau (about 100km of very flat walking if you stick to the TA). Both of these sections I hired an e-bike, treating it as a really fun rest day.
Tour Aotearoa is the TA’s bikpacking equivalent. This too runs the length of New Zealand, taking most riders between 30-60 days to complete. If you’re looking for a quicker adventure, I would recommend tackling this ride or even mixing things up by biking the North Island and hiking the South Island.

What to Expect on Te Araroa
Weather
The weather in New Zealand is unpredictable, and my hike coincided with the wettest November on record for Northland. Constant rain in the North Island meant setting up camp wet and sleeping in damp gear. By contrast, I had only three days of rain in the South Island. Be prepared for both extremes.

Sand Walking
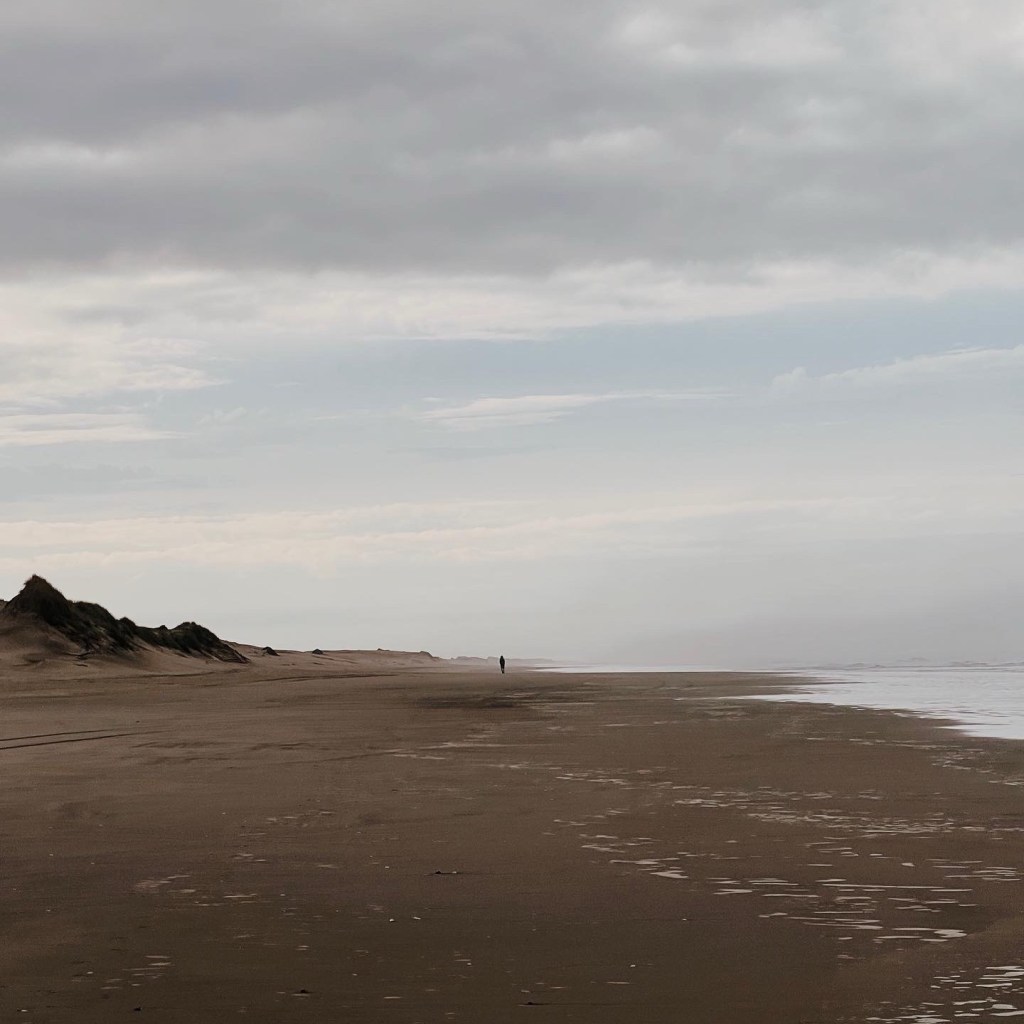
The trail’s opening act is the infamous 90-Mile Beach. While many despise this section for its monotony, I found it almost meditative with the endless ocean stretching out on one side, the occasional dune breaking the horizon. I found myself staring at the crashing waves as I walked, and even managed to sport some Orca’s just off the break. But the blisters, oh, the blisters! Sand worked its way into every crevice, wreaking havoc on everyone’s feet. Trail gaiters, Injinji toe socks, and wide-toe-box shoes like Altras became my holy trinity for foot care.
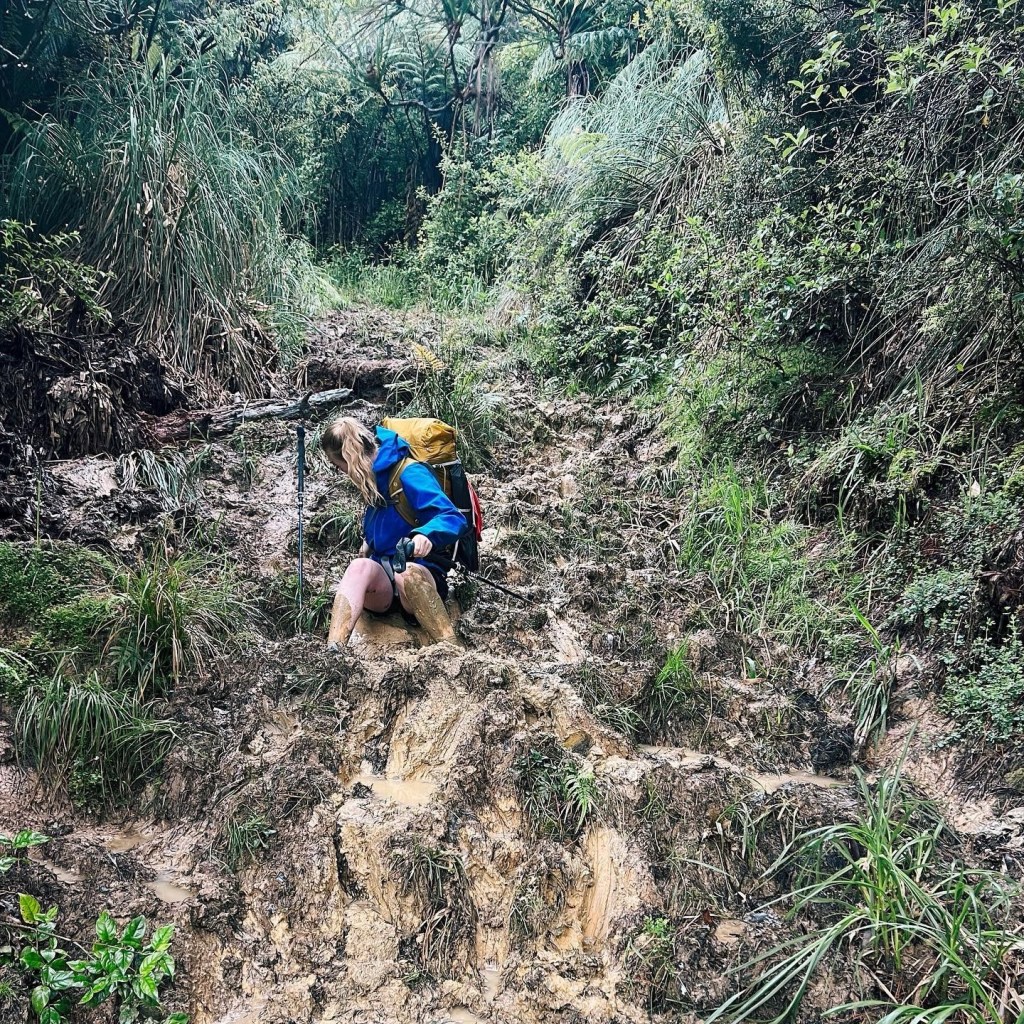
Mud
The mud was one part of the TA I dreaded before starting. But once we hit the slippery forest trails in the North Island, I was surprised to find it was actually… fun. What first seemed like a nightmare turned into pure chaos: people squealing, slipping, and losing their footing left and right. My advice to you: embrace the mud.
Road Walking
I knew the TA had a lot of road walking (around 15% of the trail) but I didn’t realize just how sketchy some of it would be. Some sections follow busy highways with no shoulder, which made for some nerve-wracking moments. While the trail sections were phenomenal, the road walks were a harsh reminder of the TA’s growing pains. Unfortunately, forest closures to stop the spread of kauri dieback meant even more road walking in the North Island for us as a result of the detours.
Sand Flies
The South Island might have been more picturesque, but the sandflies (te namu) were relentless. According to Māori legend, the goddess of death, Hinenui-te-Pō, released te namu (which literally means “little devils”) into Milford Sound to keep people from lingering too long, fearing its beauty would make them idle. Safe to say, she did a bloody good job. As a cold sleeper, I wore thermals to bed, and they also doubled as my best defence against the bugs when walking around in the evening.

Trail Culture
The TA’s growing popularity means these days it’s rarely a solitary experience. While I cherished the friendships I made, the crowds also brought out “purist vs. hitchhiker” debates. Some hikers looked down on those who hitched, or section hiked, which, honestly, just created unnecessary tension. “Walk your own walk” became my mantra. It taught me to embrace the moments of solitude and make sure I was hiking for myself, not for anyone else’s expectations.

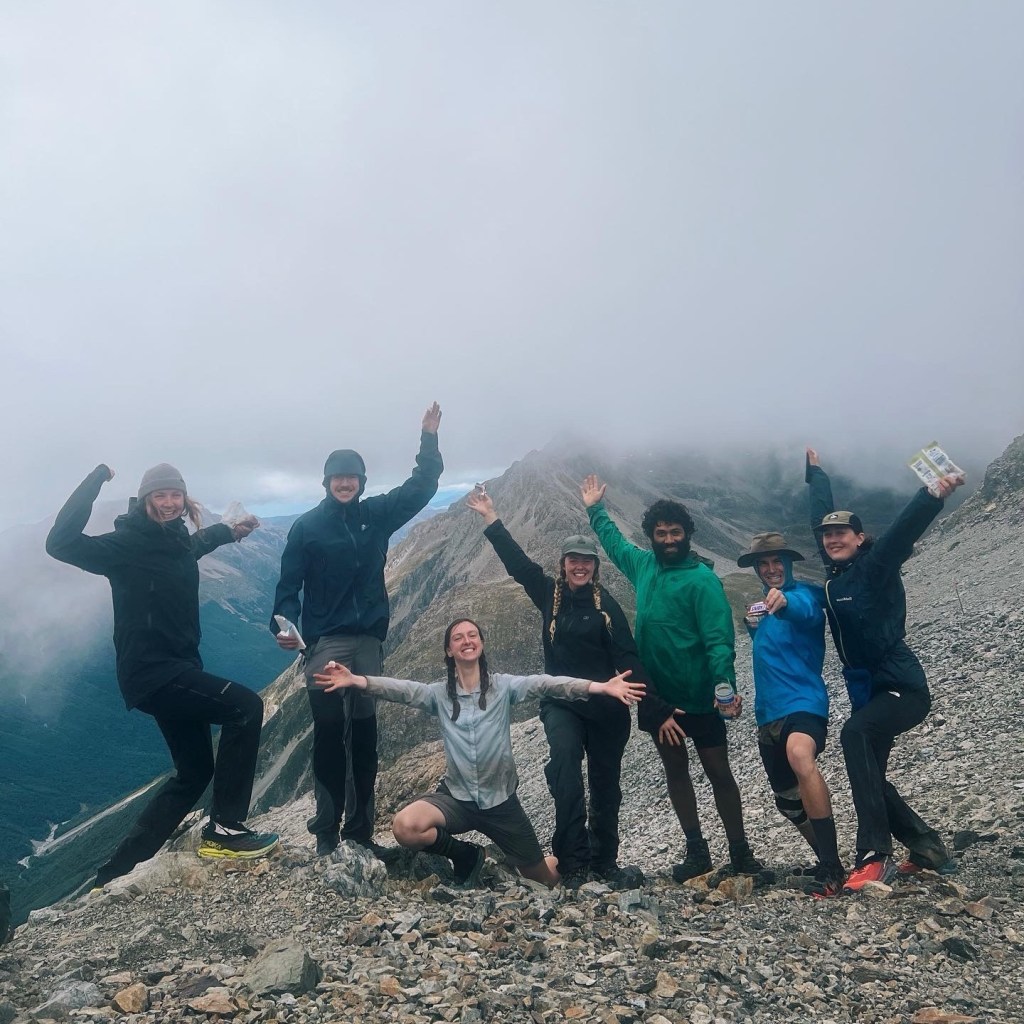
Trail Family
My trail family are now friends for life. They helped me through the toughest days, loved me at my absolute worst (and smelliest), and always had an extra snack when I needed it most.
Hiking with a trail family is without a doubt incredible, but it also came with a bit of groupthink. There were times I let the dynamics dictate my pace or decisions, and looking back, I realize I missed out on some side-trips because of it.
At the end of the day, this is your hike. Take the detours. Linger in places that call to you and only hike on when you’re ready.
Final Thoughts
North vs. South Island
The South Island stole my heart. Its dramatic landscapes and uninterrupted trails felt like stepping onto a completely different trail. With fewer road walks and more consistent trail continuity, it felt like a true wilderness adventure. The North Island, on the other hand, felt a little more disjointed, like a series of trails stitched together with road walks in between.

In saying that, the highlights of the North Island were unforgettable and still worth checking out. For future hikers, I recommend treating the North Island as a warm-up for the South. Consider section-hiking the best parts of the North Island and focusing your energy on the South or even biking the Tour Aotearoa on the North Island and hiking the TA on the South Island. If you only have time for one island, the South is the clear winner.
Te Araroa is a trail of contrasts. It’s beautiful and challenging, rewarding and frustrating. It taught me resilience, patience, and the importance of walking my own walk. If you’re considering the TA, go in with an open mind and realistic expectations. The trail isn’t perfect, but it’s an adventure you won’t forget.
Would I do it again? Maybe, but differently. And that’s the beauty of the TA! It’s a trail that’s still evolving, just like the hikers who take it on.

Disclaimer: Content on Path & Pedal is for general information and inspiration only. All route guides and trip reports are based on personal experience and research at the time of writing. Conditions, access, weather, and regulations can change. Always check official sources and use your own judgment. Outdoor adventures carry risk, and Path & Pedal accepts no liability for injury, loss, or damage.


Leave a comment